An exciting day ahead as we planned to climb Scafell Pike, the highest mountain in England. Wainwright [Scafell Pike 12 – Book 4] says that “The ascent from Borrowdale is pre-eminent, because not only is the scenery excellent throughout but there is the advantage of two interesting and well-contrasted routes, so that one may be used in ascent and the alternative in descent, the whole round, in settled weather, being perhaps the finest mountain work in the district.” I would certainly agree with Wainwright here and this is exactly what we had planned to do today.
Our route would take us from Borrowdale via Grain’s Gill returning along the so called ‘Corridor Route’ which is said to be more interesting and challenging than the easier Wasdale route. It was certainly quite a challenging route and not one I would like to do on a wet day because the stone slabs that needed to be climbed near the summit would be quite slippery. Today the weather was perfect for a walk like this. Being such a popular fell the route is, on the whole, very easy to follow.
AW tells us [Scafell Pike 5 Book 4] that ‘Strictly, the name ‘Scafell Pike’ should be in the plural, there being three principal summits above 3,000 feet, the two lesser having the distinguishing titles of Broad Crag and Ill Crag. The main Pike is, however, pre-eminent, towering above the others . . . ‘
WAINWRIGHT BOOK: The Southern Fells Book 4
DIFFICULTY: 5 WALK LENGTH: Full day 
DATE and START TIME: Saturday 8th August 2015 Start time around 8 am finished around 4.30pm.
PARKING: Roadside Seathwaite farm, Borrowdale (I put Seatoller into the SATNAV once there you can see signs for Seathwaite Farm. (The farm does have a carpark next to the campsite.) (CA12 5XJ)
ROUTE WALKED: Seathwaite Farm, Stockley Bridge – Grains – detour to Sprinkling Tarn – Esk Hause – Scafell Pike summit – descending via Lingmell Coll and the ‘Corridor’ Route to Styhead Tarn – back to Stockley Bridge and finally back to the car at Seathwaite Farm.
WALK DETAILS: c.It took us about 8.5 hours though we did have plenty of stops! 14.5km / 9.01 miles
HIGHEST POINT: Scafell Pike – 978m / 3,210ft.
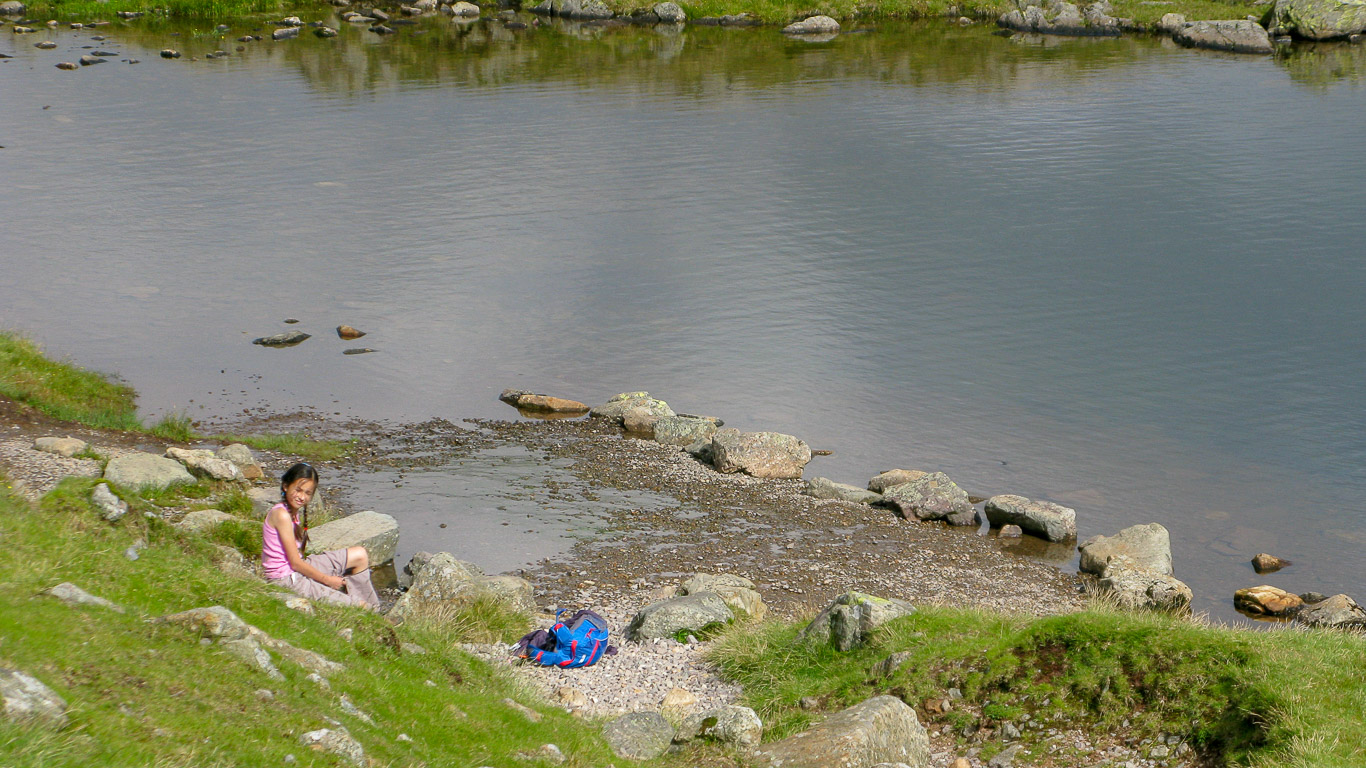
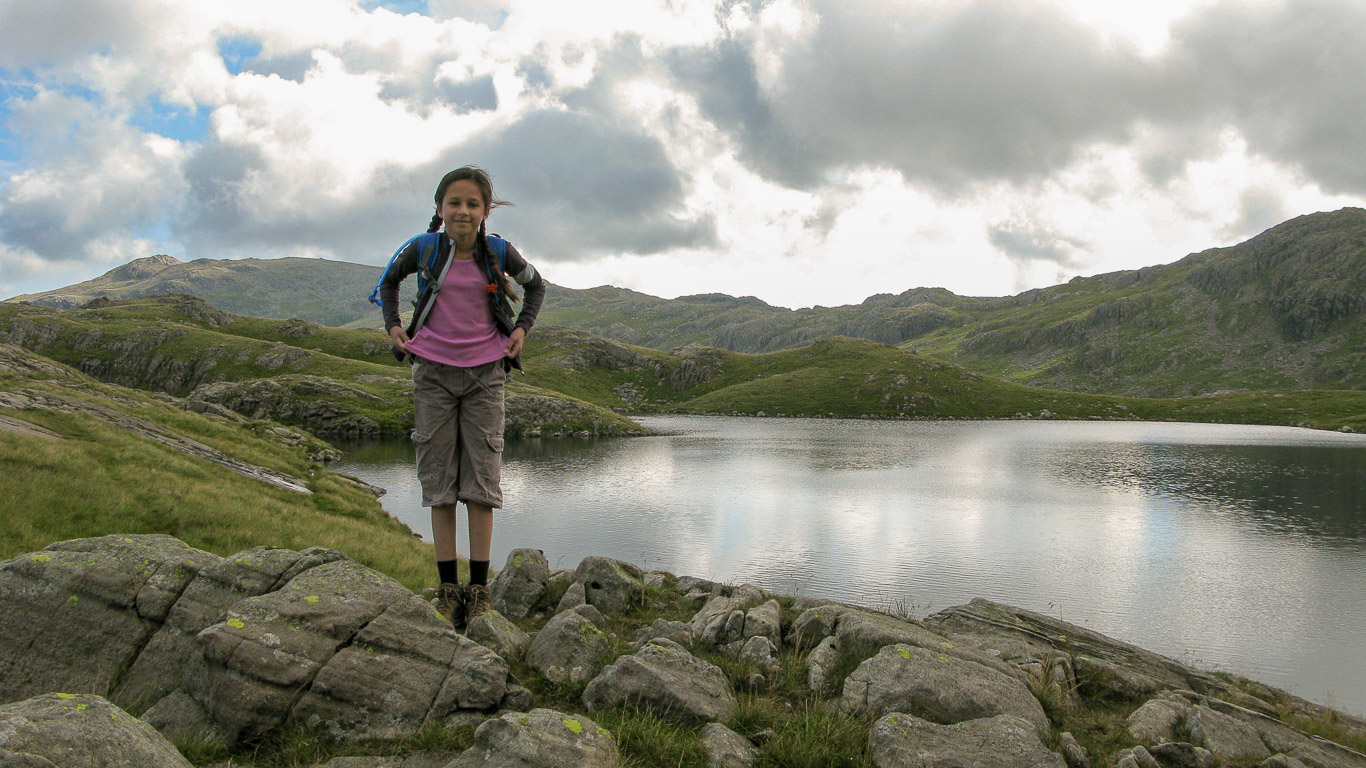
WALKED WITH: Pal and Mila (aged 12).
WEATHER: Lovely weather.
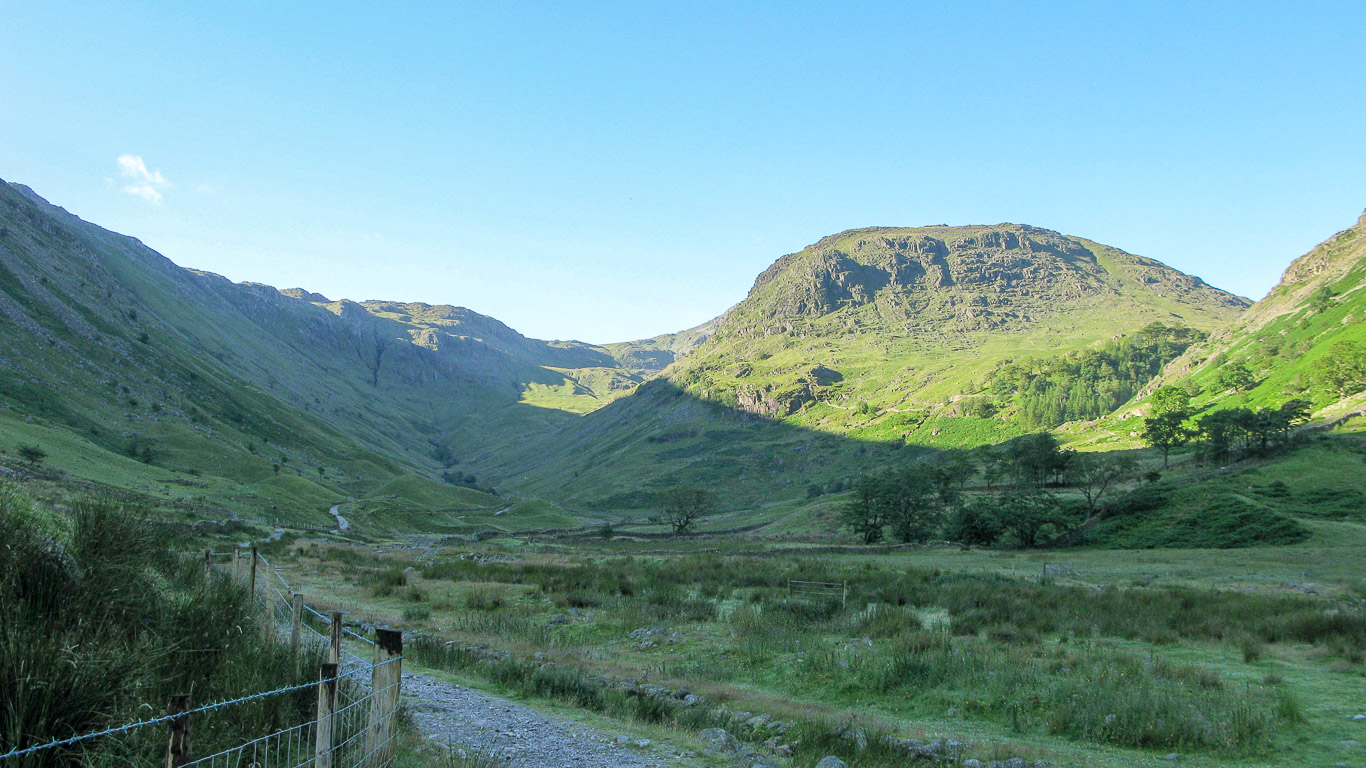
After parking the car on the roadside near Seathwaite Farm we set off along the clear track with Seathwaite Fell straight ahead and the slopes of Base Brown on the right of the photograph; following the bridle path to Stockley Bridge. You might be interested to know that Seathwaite is said to be the wettest inhabited place in England according to Wikipedia, receiving around 3,552 millimetres (140 inches) of rain a year. The summit of Scafell Pike can’t be seen from the valley.

Another photograph of Seathwaite Fell in the sunshine ahead and the slopes of Base Brown on the right. The top of Seathwaite Fell is easily reached from Sprinkling Tarn (which is the source of the River Derwent), though we wouldn’t have time to do this today.

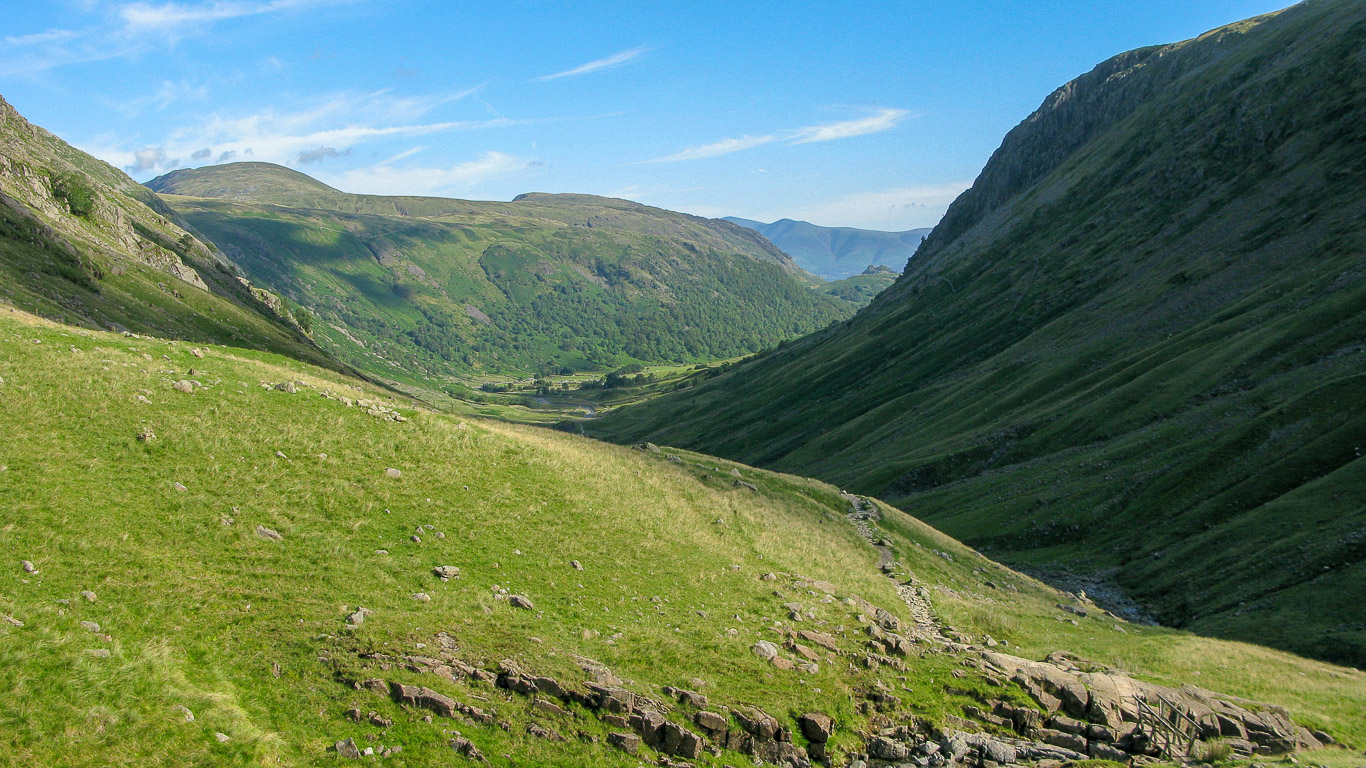
On the left are the slopes of Glaramara with Allen Crags in the distance and the dip being Esk Hause, then Seathwaite fell and the lower slopes of Base Brown. We walk along the valley of Grains Gill, with not another walker in sight – quite different from the summit! And as you can see the route is very easy to follow.
Glaramara on the left with Allen Crags on the right, taken from Grains Gill.
Panorama of the same view
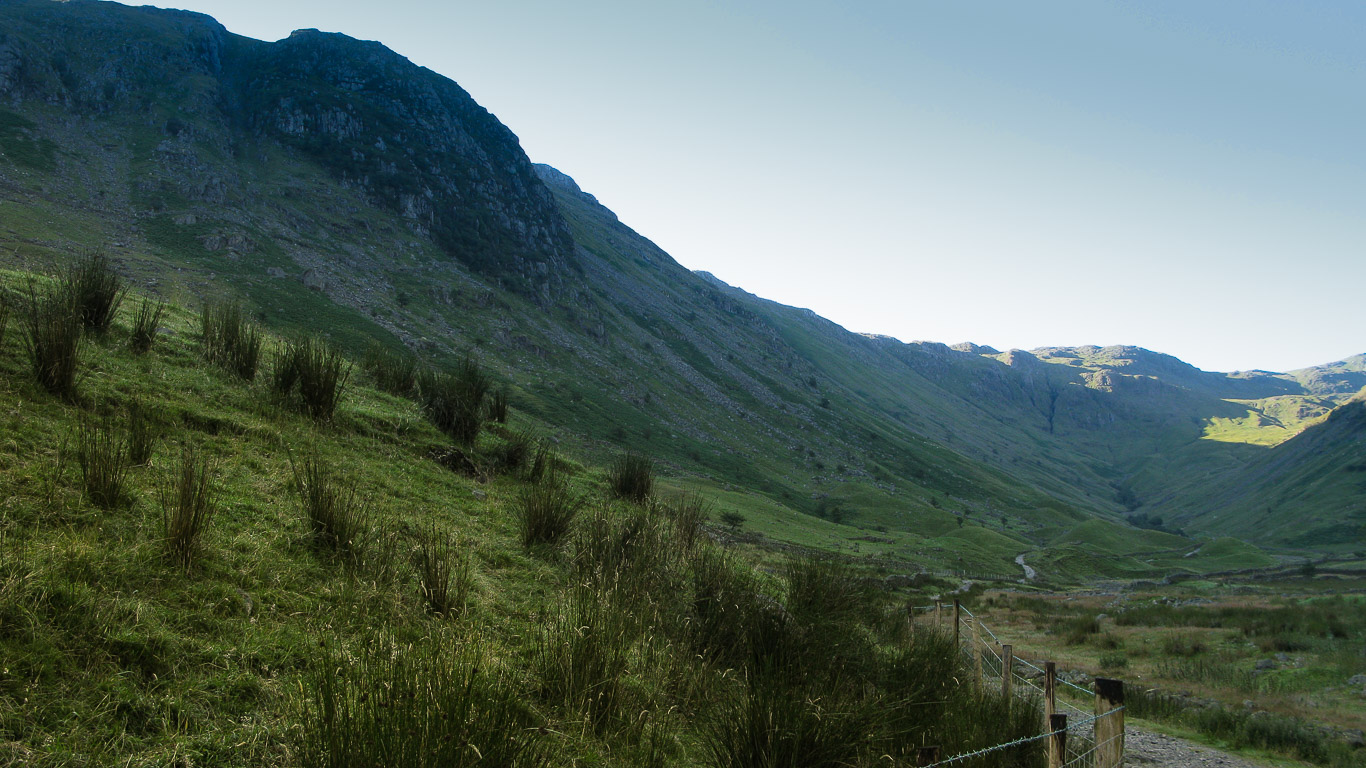
Stockley Bridge across Grains Gill and the choice of routes . . . straight on – to the right of Seathwaite Fell leads to Styhead Pass, the route to the left of the fell (our route) leads Esk Hause. Stockley Bridge is a Grade II listed historic packhorse bridge constructed in 1540 but partially demolished after floods resulting from five inches of rain falling in an hour in 1966. Goods like salt, wool and charcoal were transported by pack animals through the Lakeland valleys and mountain passes like this for centuries.


The route straight ahead here goes to Styhead Pass and will be our return route. At Stockley Bridge – upstream is Grain’s Gill and downstream is the River Derwent – it can get confusing as it changes its name again, after the wooden bridge we’ll come to soon, when it becomes Ruddy Gill!

We started to go up the route ahead just to backtrack back to Grain’s Gill, the routes go either side of Seathwaite Fell, the route ahead going to Styhead Pass and the route we would be returning by. Our planned ascent route was instead, to go along Grains with Grains Gill on our left to ascend via Esk Hause.

Yes, this is the right way for our route, alongside the stream!

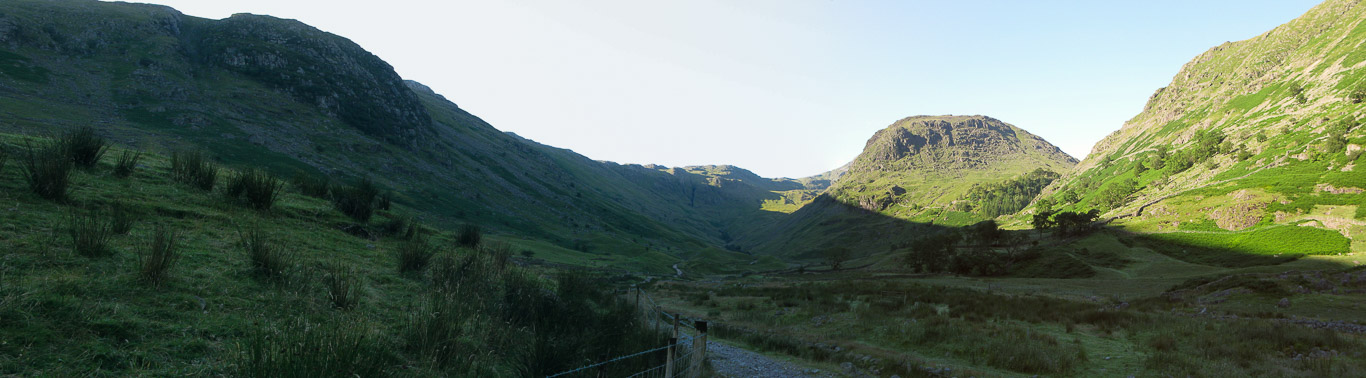
Looking along Grains Gill from Stockley Bridge with Allen Crags at the end of the Glaramara ridge with the slopes of Seathwaite Fell on the right.
Across the wooden bridge, the top bridge on Grains Gill. The path we’re on heads for Esk Hause following Grains Gill (which becomes Ruddy Gill after this wooden bridge). Considering how many photographs I took today it’s rather annoying to know that if I’d taken a photograph of the bridge from the side looking up I’d have photographed our target for today’s walk – Scafell Pike and its cairn! . . Mila already beginning to feel the heat as the morning warms up.

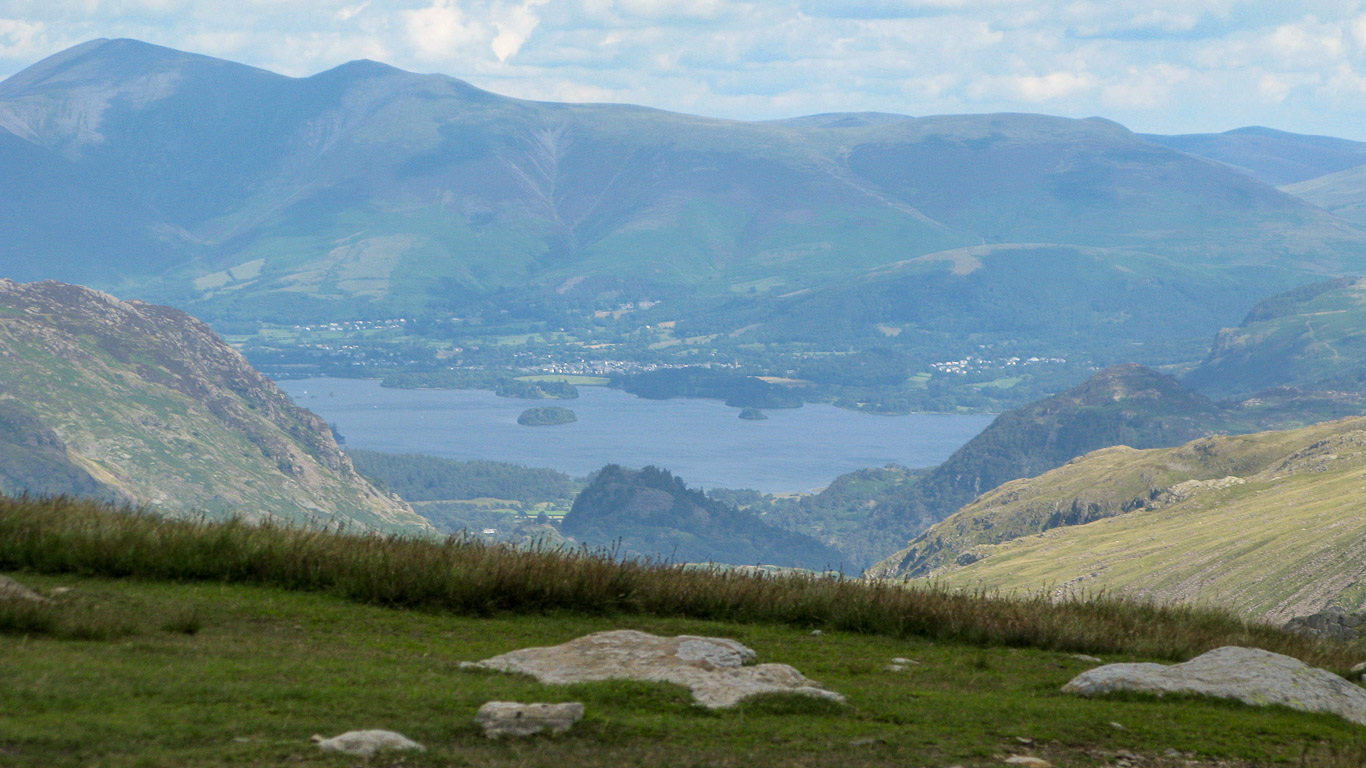
Looking back towards the Northern Fells with Skiddaw and Skiddaw Little Man. You can just see Castle Crag (in front of the Northern Fells in the dip between the two fells on either side). The fell to the left of centre in the photograph is the ‘bump’ of Dale Head then further right is High Scawdel with High Spy just rising above it. On the right are the slopes of Glaramara. The second photograph shows the same view but from higher up the route.
Great End is on the left of the photograph with the slopes of Seathwaite Fell on the right.

Great End and Ruddy Gill – if you look really closely you can see two walkers on the path ahead.
Mila has no problem with the climb . . .

. . . and only needs to wait for us ‘oldies’ to catch her up!

Mila with Great End on the right.

Great End dominates this section of the walk. The mature pitched path leads us up towards the crags of Great End with its impressive central gully.

Looking back there’s a gorgeous view right down the valley looking north with Castle Crag in the centre in the “Jaws of Borrowdale’ and the Northern Fells beyond Derwent Water.

A close up of the view north to the Northern Fells beyond Derwent Water and Keswick: Carlside; Skiddaw; Skiddaw Little Man then along the ridge to Lonscale Fell behind and to the right of it is High Pike and Mungrisdale Common; with Latrigg the small fell just to the right of Keswick. On the right you have Blencathra. Right in the centre of the photograph is Castle Crag with High Scawdel to the left of it (with Dale Head the ‘bump’ behind it on the left of the photograph) and King’s How to the right with Grange Fell beyond. High Doat is the small fell in front of Castle Crag with the wooded slopes of Low and High Stile Wood on the left. In the foreground you have the slopes of Seathwaite Fell on the left and Glaramara on the right.
Looking down onto Ruddy Gill.

It’s a long steady climb with an easy to follow path . . . but you do need to pace yourself!

Great End in all it’s glory!
We could have done a short detour here to ‘bag’ Great End, but with a long walk still ahead of us we decided not to add any extra diversions from our goal of Scafell Pike. Great End is on the right of the photograph and our route will take us round to the right skirting its base.

Around this point we do however do a slight detour to visit Sprinkling Tarn.

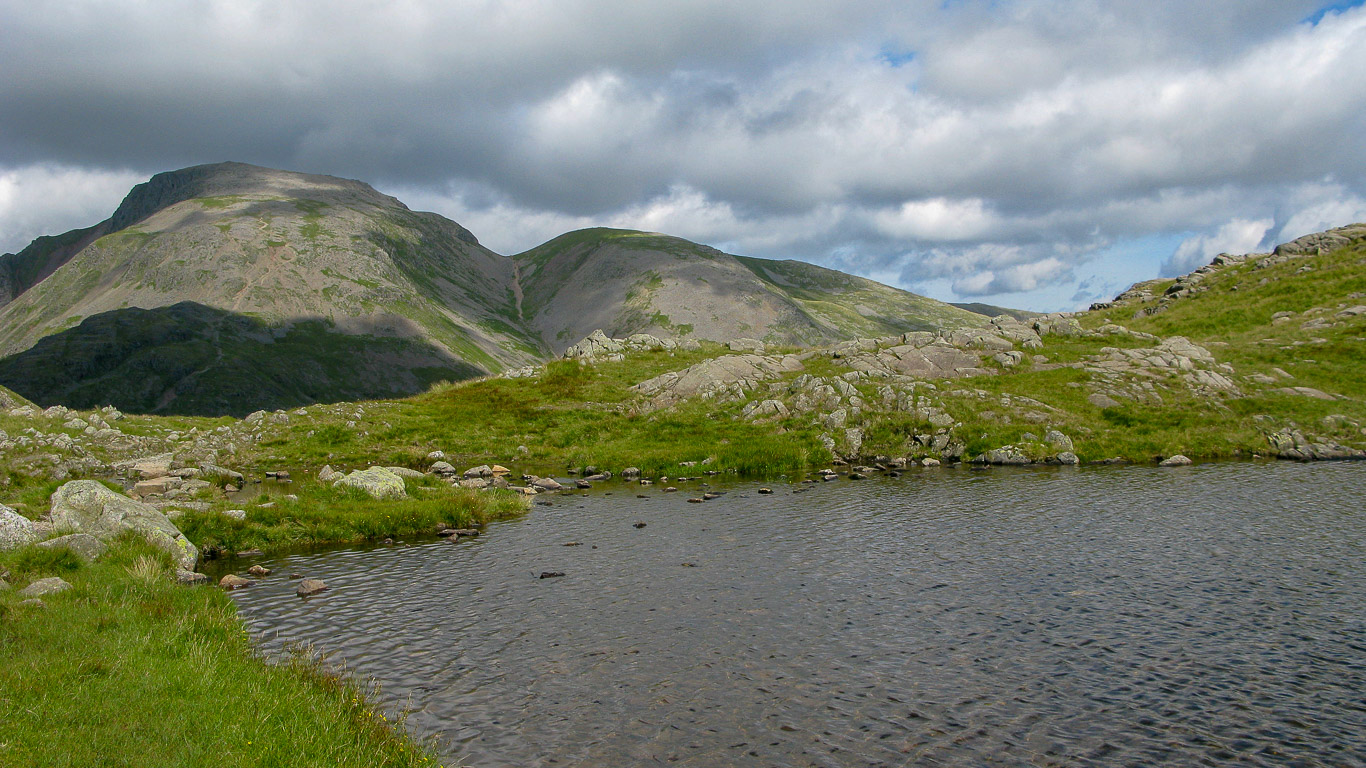
There’s Sprinkling Tarn ahead of us and well worth the short detour. The two prominent Western Fells on the left are Great Gable and Green Gable (to the right of the gully) whose ridge runs down to Base Brown. Behind the ‘dip’ of the ridge, the darker fell is Brandreth.
Similar to the photograph above but with the path more clearly visible.
This time with the summit of Great Gable lost in cloud (Green Gable on the right).
Looking across Sprinkling Tarn.

Great Gable with its summit lost beneath clouds. The path continues on to Sty Head, an alternative route.

Time for Mila to get her legs out . . . all of this hard work makes you hot!

Looking towards Great Gable and Green Gable with Brandreth on the right now more visible.

. . . Mila’s added one layer . . .

Looking back at the way we had just walked.

Glaramara with the ridge route leading to Allen Crags.

Stepping stones across Sprinkling Tarn with Great Gable ahead and Green Gable to the right, but not the way we’re heading today.
One moment Mila’s taking off the layers, then adding her jacket . . . the next minute it’s back to fleece and hat! She must be feeling the chill now she’s had a rest and cooled down.
. . . Time to get going . . . there’s still a fair way to go before we reach our destination.
Blencathra in the distance on the right. Ruddy Gill is in the centre with, I think, Allen Crags ahead.
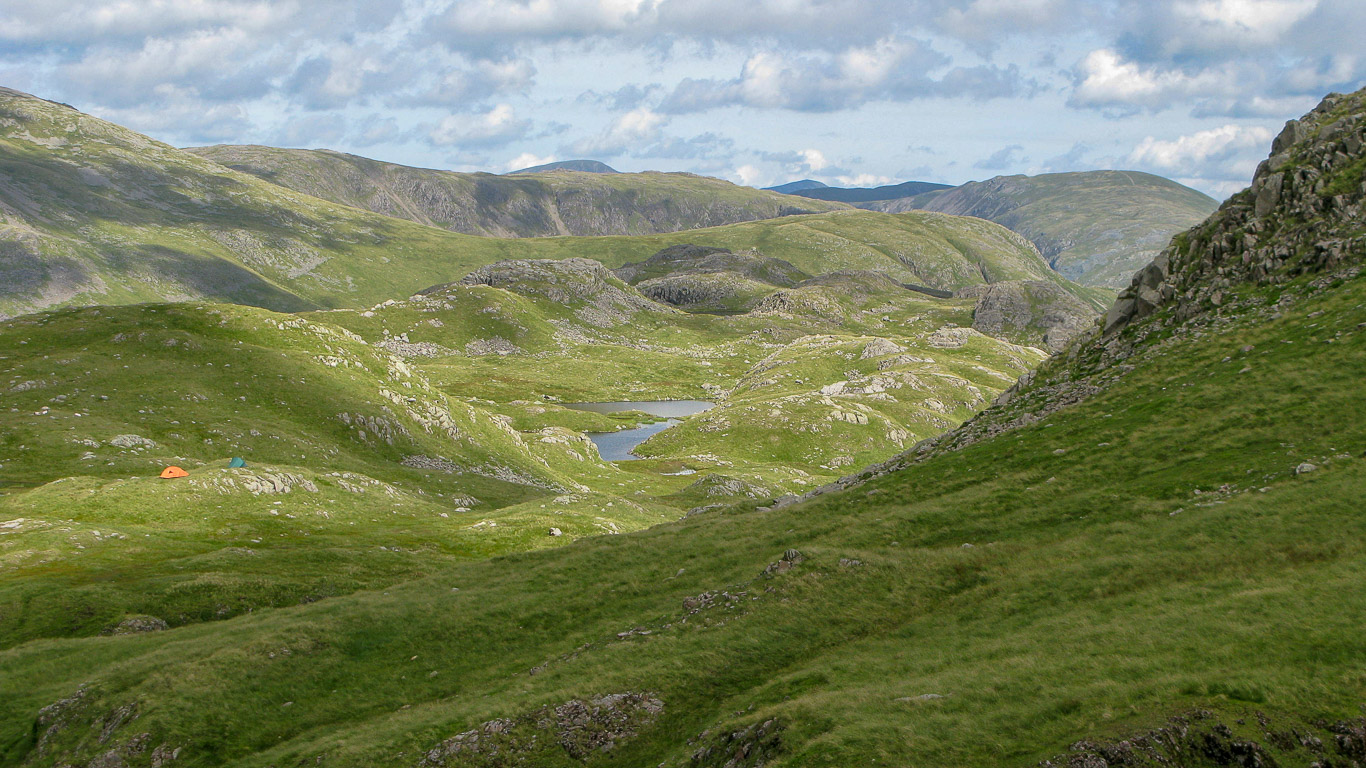
Some wild campers. Wouldn’t it be spectacular to stay overnight here? The Northern Fells are in the background.

The grass and moss look all velvety.

Looking back at Sprinkling Tarn with the slopes of Green Gable beyond leading down to Base Brown. Brandreth is seen beyond. The fell on the right is, I think Dale Head, but I could be wrong!
Hey, Mila, have you shrunk or is your walking pole set up for Dad?

Mila and Pal – notice the criss-cross of paths behind them.

A dramatic photograph of Great Gable, Green Gable leading along the ridge to Base Brown and behind Brandreth and to the right I think It’s Dale Head; with the Northern Fells in the distance. Taken from near Esk Hause on the route up to Scafell Pike.

A panoramic view now includes Derwent Water.
A little artistic touch as Pal balances a tiny pebble on the top of the cairn. Is that an admiring glance by Mila?

Pal and Mila deep in conversation as we walk higher and higher.

Close up of the Northern Fells of Skiddaw, Skiddaw Little Man and Lonscale Fell and High Pike beyond with Keswick at their base and Latrigg to the right of Keswick. In front of Derwent Water you have Castle Crag with King’s How on the right of it.
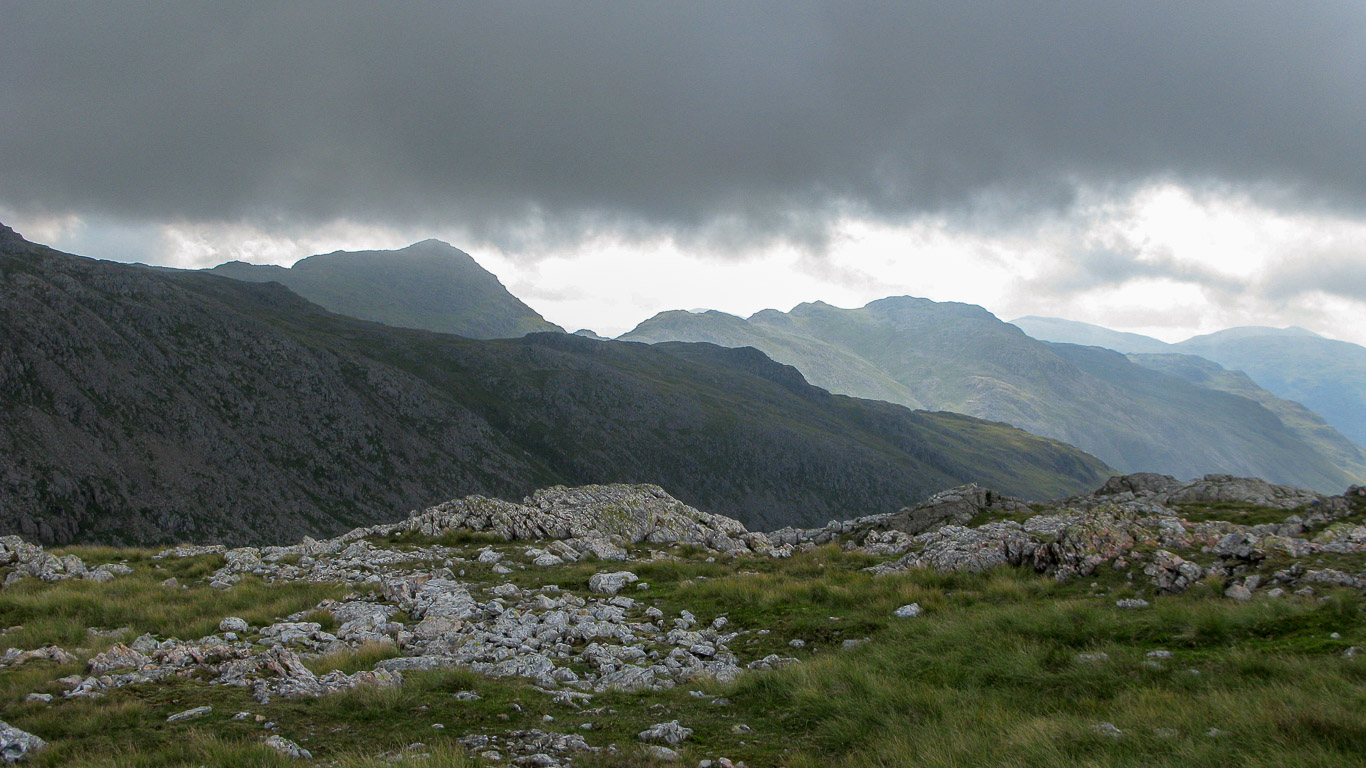
After turning left at the foot of Great End, we climbed up to Esk Hause and here Esk Pike comes into view – the summit out of sight from here.

Looking across the Langdale Valley from Esk Hause you get the spectacular view of the Langdale Pikes with their distinctive outline. There’s the flat-topped Harrison Stickle, then the beautifully rounded Pike o’ Stickle followed by last summit of Loft Crag – the clouds look ominous – let’s hope they’re not coming this way!

The level close cropped grass tells us that we’ve reached Esk Hause and the high level interchange for a number of famous Lakeland fells – so it’s important to take your time here to ensure that you continue on the right track! Is that Great End behind Mila??? Then further to the left is that Broad Crag????

That’s definitely Pal and the distinctive shape of Ill Crag (the third of the Scafell Pikes, and as AW describes it [Scafell Pike 10 Book 4], ‘the most shapely appearing as a graceful peak when viewed from upper Eskdale, which it dominates’ behind him – above Esk Hause. AW warns that ‘walkers on their first ascent of Scafell Pike will wrongly assume that it is their objective.’

From Esk Hause the route becomes much busier and there are clearly several challenges going on as we see numerous teams the nearer the summit we get. There are also a number of fell runners so maybe there’s a race going on too.

Fingers crossed these grey clouds are not coming our way . . . It looks like someone is in for a drenching!
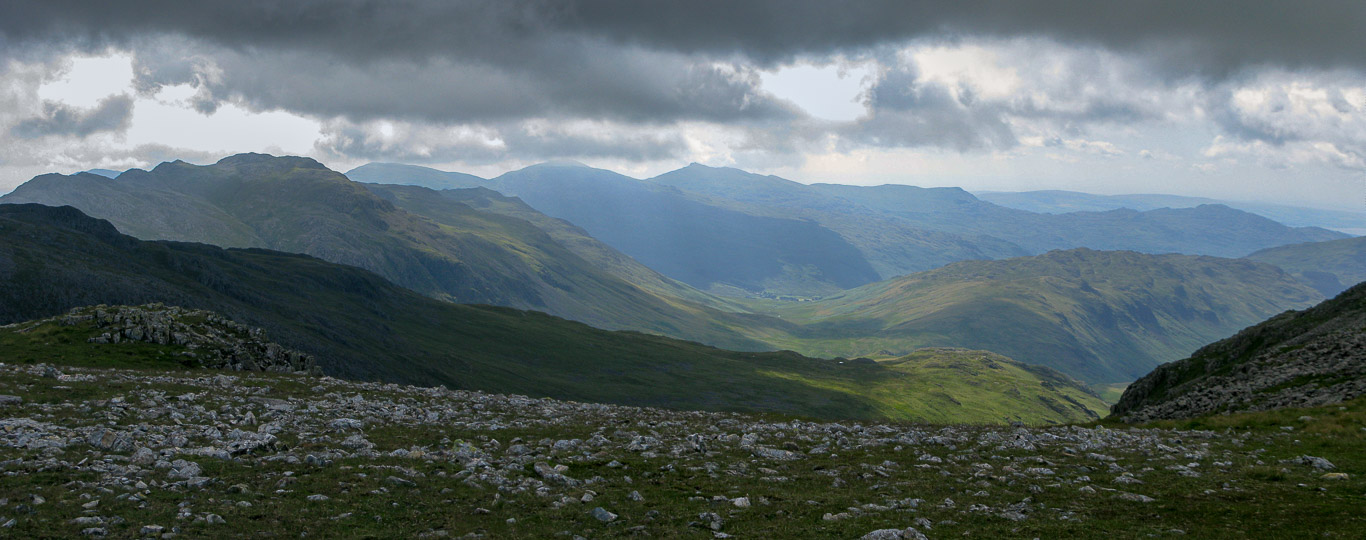
Bowfell is in the distance with Crinkle Crags to its right.
Another view across to Bowfell.

Crinkle Crags and the Langdale Valley.

Looking down the Langdale Valley with The Band on the right.
Ill Crag on the far right of the photograph.


If you look carefully you can see the luminous green tops of some of the walkers. The path is distinct and well-cairned but in places is formed of nail scratches on boulders. The summit of Scafell Pike only comes into sight as you climb Ill Crag.


The views are spectacular. There’s Kirk Fell in the centre of the photograph with Great Gable on the right.

AW [Scafell Pike 20 Book 4] ‘Many hearts have sunk into many boots as this scene unfolds. Here on the shoulder of Ill Crag, the summit comes into sight, at last; not almost within reach as confidently expected by walkers who feel they have already done quite enough to deserve success, but still a rough half-mile distant with two considerable descents (Ill Crag col and Broad Crag col) and much climbing yet to be faced before the goal is reached.


Mila still looking surprisingly chirpy, she loves anything that can be climbed.

A helicopter, actually below us . . . let’s hope it’s just sight-seeing and isn’t rescuing anyone.

Mila still has a impressive amount of energy.

The grey clouds we saw earlier seem to have disappeared and we’re left with lovely fluffy clouds and a fantastic view.

Aah, there are the grey clouds, but luckily they don’t seem to be heading our way.

The path is clearly cairned so it’s easy to know which way to go.

We’ve still got a way to go.

. . . A steep climb ahead . . !

Another photo of Kirk Fell.

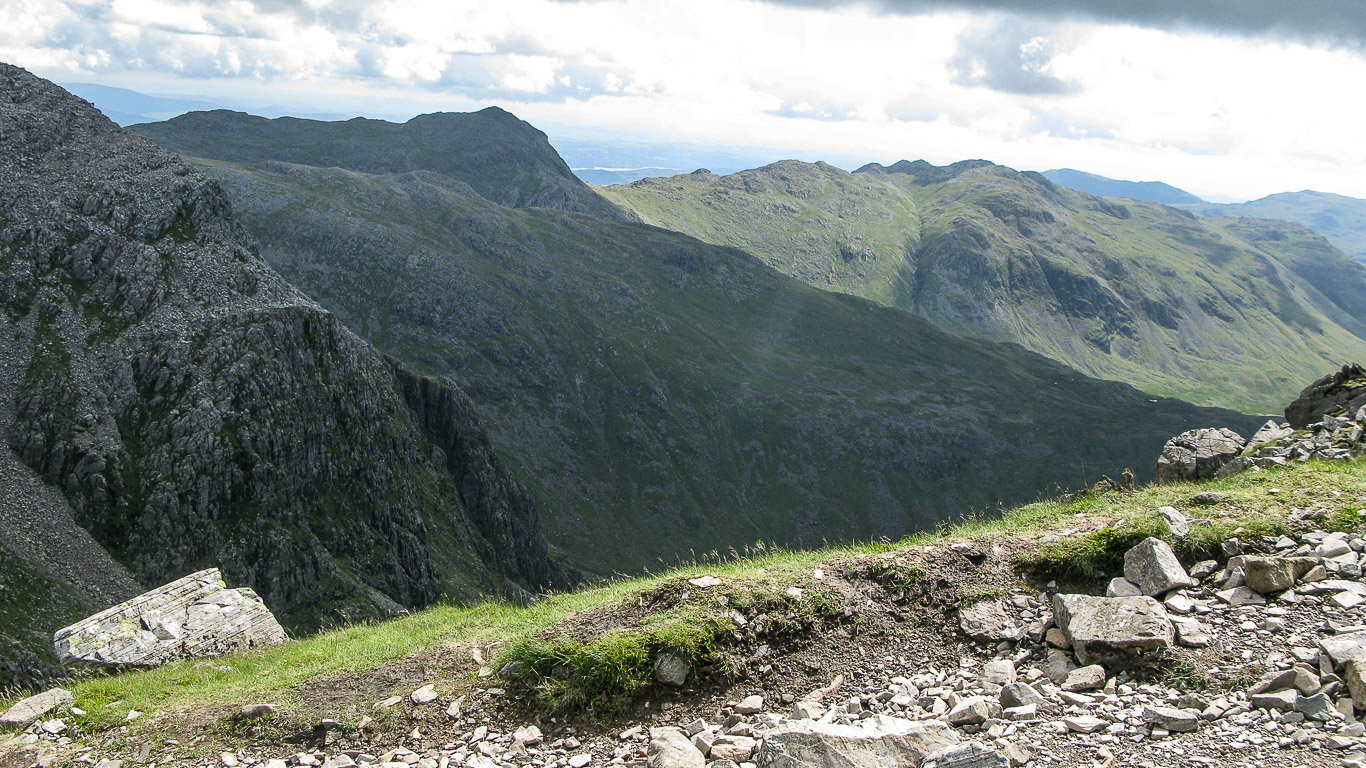
Great Gable from the route up to Scafell Pike.
Great Gable; Green Gable with the ridge forking down to Base Brown then Brandreth (behind the ‘dip’). Sprinkling Tarn is the larger of the two tarns seen below.

You can just see the summit shelter on Scafell Pike ahead but we have to descend first before our final ascent to reach today’s goal.


Our final ascent is pretty steep . . .

You can see the summit shelter on top and if you look very carefully you can see that it’s already pretty crowded.

. . . not so far to go now . . . but definitely far enough . . .

It’s looking pretty crowded up there . . . but wait till you see how crowded it is when we actually arrive!

. . . it’s quite hard on the knees.

The final steep pull up to the summit.

A quick glance around at the view . . .

This photograph gives you an idea of the steepness of the gradient for this final ascent to the summit.

Mila still looking as fresh as a daisy . . . how does she do it?

Looking down on Great Gable with the unnamed tarn above Sprinkling Tarn visible.

Pal taking a little breather . . . it’s a steep ascent.

The perfect spot for Mila to catch the sun and take a breather too.

Pretty dramatic isn’t it? Looking back the way we’ve come . . . there’s the rounded summit of Ill Crag.

Another look back. This time with Broad Crag being in the centre with the path going over it to Ill Crag behind.

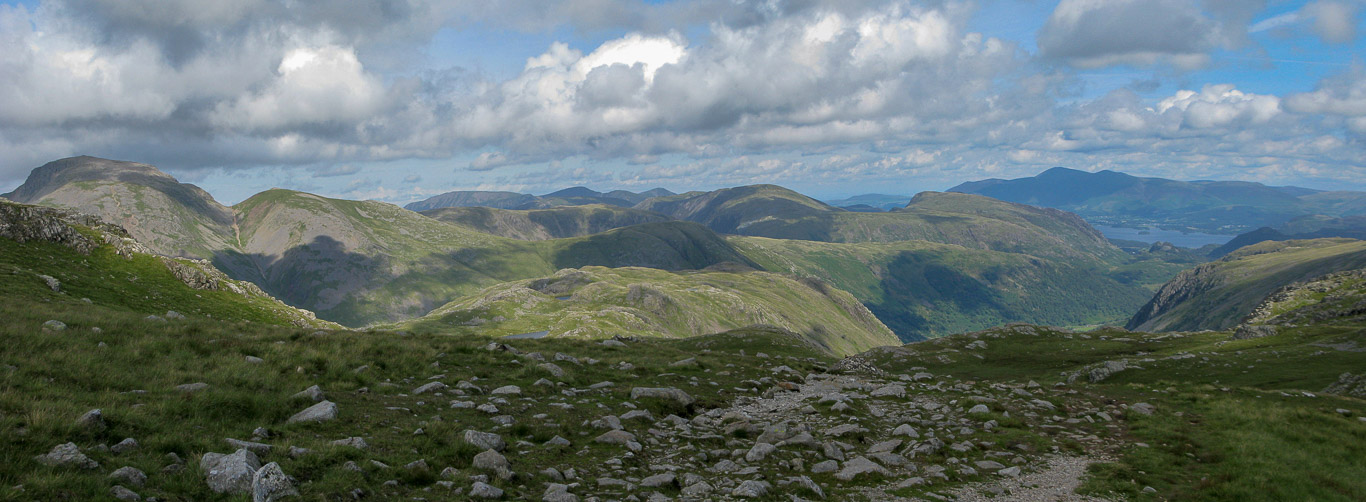
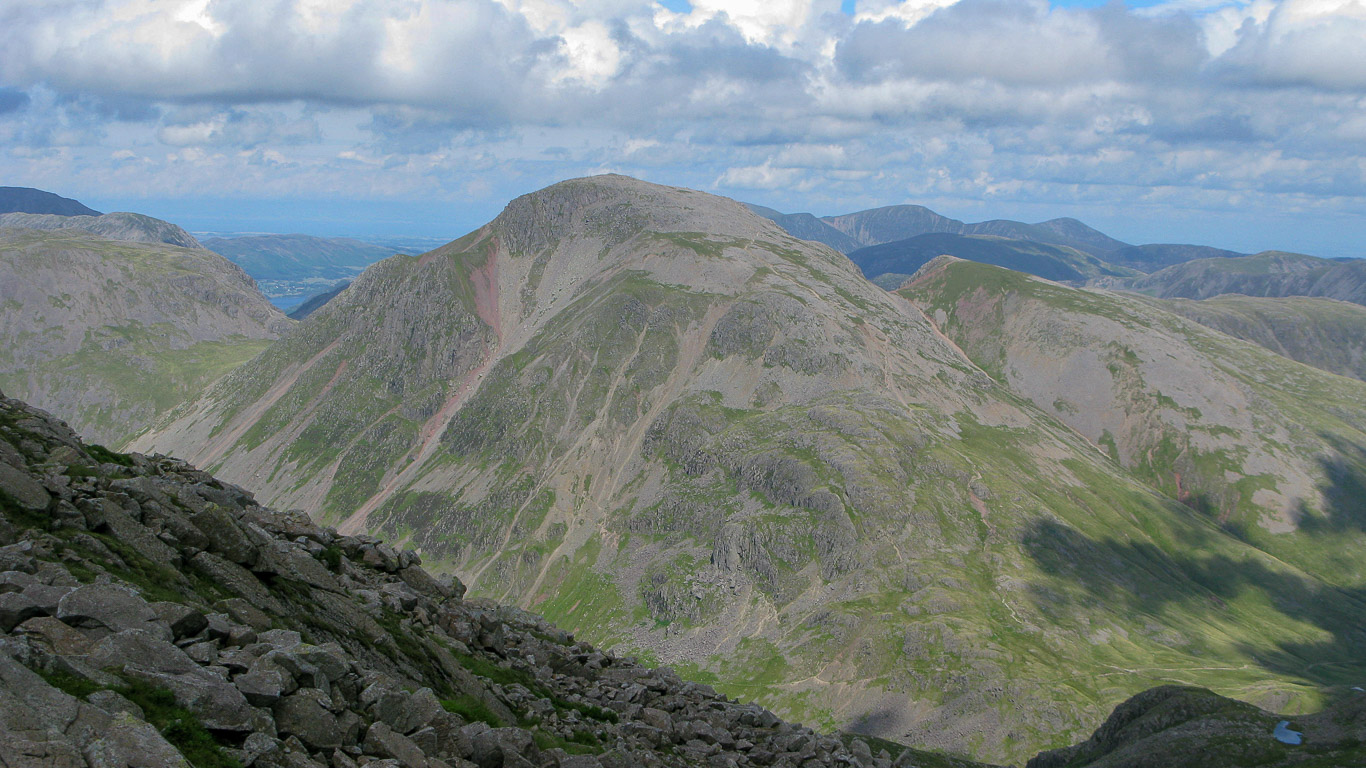
After seeing few walkers on most of our ascent it became busier and busier the closer we came to the summit. There’s Great Gable in the centre with the darker fell behind and to the left being Grasmoor.

Kirk Fell with Red Pike and High Stile behind then Grasmoor with Great Gable behind the walker in the centre of the photograph. Then further right you have Green Gable.

A clearer view back towards Broad Crag with the path going on to Ill Crag behind it. I have to admit it’s a bit of a relief that that’s all behind us!

Ill Crag and beyond it Bowfell with Crinkle Crags in sunlight.

Looking back: There’s Broad Crag; Ill Crag; Bowfell and Crinkle Crags.

A close up of Bowfell and Crinkle Crags now bathed in sunshine.
Crinkle Crags.

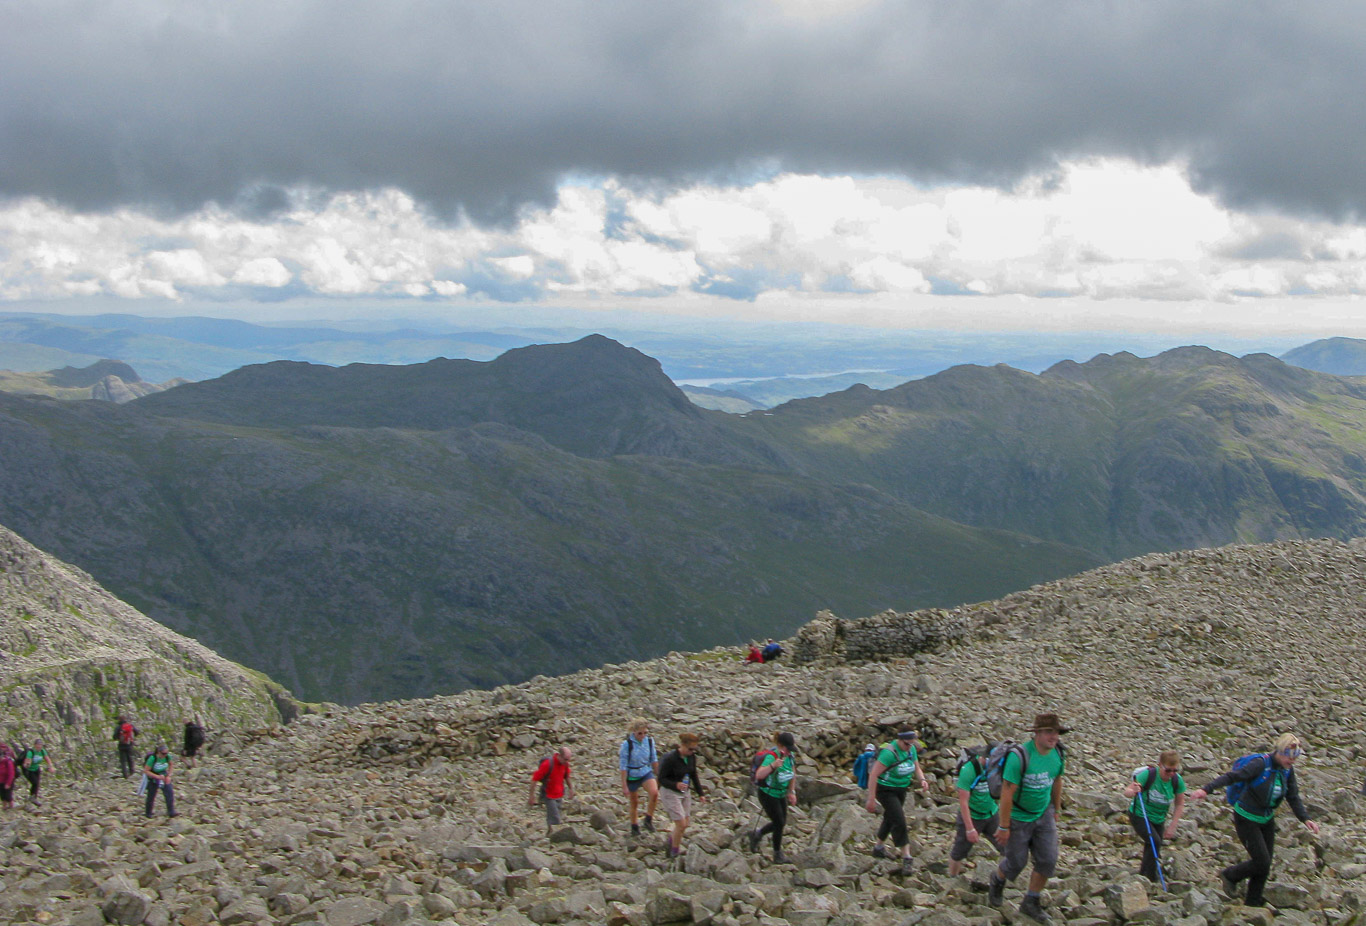
Hoards of walkers climbing Scafell Pike. Looking back at Broad Crag and Great End beyond with Ill Crag on the right of footpath just out of shot.

Mila loves all the climbing involved but she always has time for a rest while she waits for us to catch up.

. . . still smiling . . . maybe that’s because she’s at the top, the climb being behind her! Broad Crag and Great End to the right of Mila).

Not much further to go now . . .

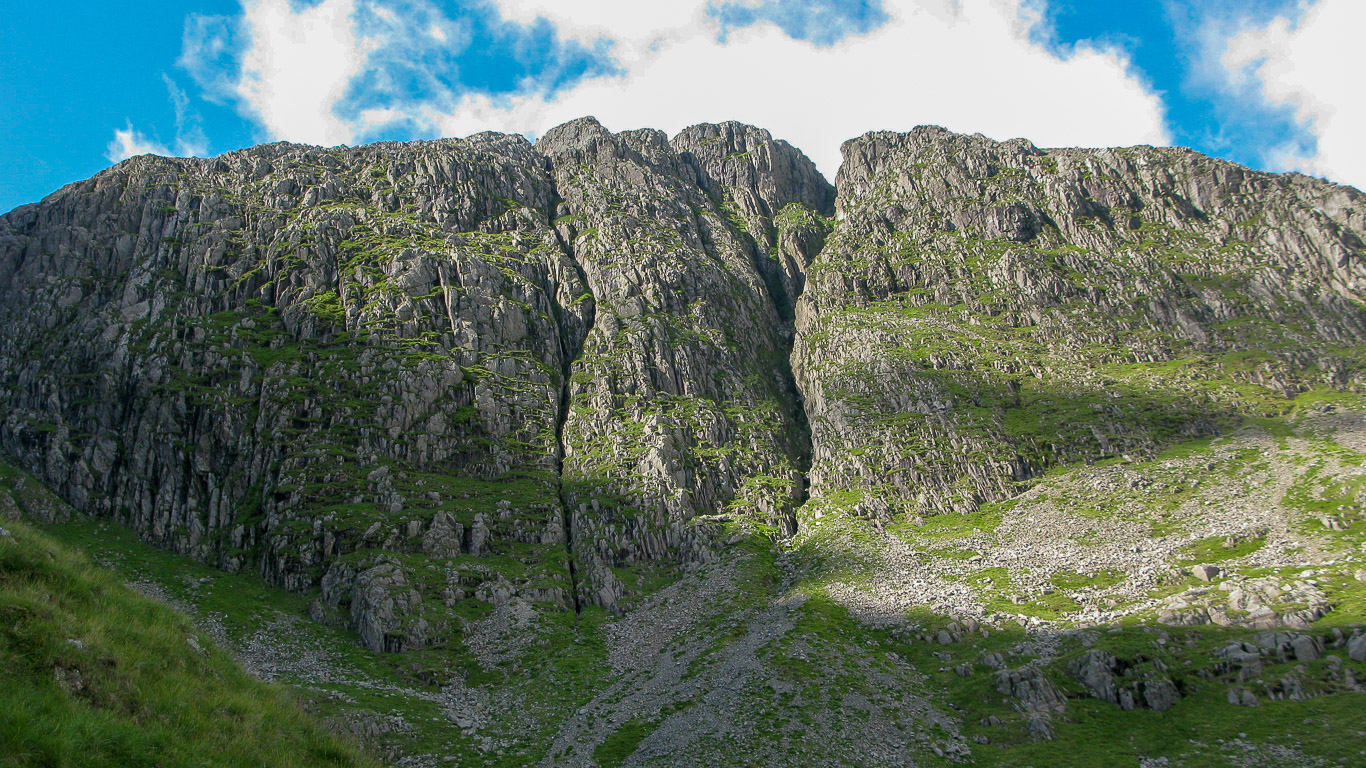
The surface is quite hard to walk on and I wouldn’t fancy walking across these stones if it was wet. There’s Scafell behind the walkers showing the scale of the fell. The peak on the right of the photograph is known as Symonds Knott with the crags beneath being Scafell Crag. The most distant fell on the left is Black Combe.

There were a number of walking groups doing various challenges which added to the huge numbers of walkers on the summit.
Finally on the summit of Scafell Pike! High Raise is behind Ill Crag with the Helvellyn range in the distance just left of centre.

What a view . . . and how lucky are we with the weather! Scafell behind Mila and Symonds Crag is seen behind Mila with Wast Water to the right. In the distance is Buckbarrow (on the far right) Sellafield beyond and the Irish Sea on the horizon.

A close up of Wast Water and Buckbarrow on the right with Sellafield in the distance and the Irish Sea on the horizon.

Unfortunately walkers were ‘hogging’ the summit eating their lunch in the circular summit shelter which felt a bit thoughtless as it was quite obvious that many people, pleased with their achievement, would have liked to have had their photograph taken there . . . well, I would have liked to take a quick photo . . . but, no chance, it was way too crowded to get a look in! Here’s Mila beside the summit trig column.

. . . this time with Pal too!

A photo opportunity on a different part of the summit . . .

. . . is this my better side? . . .

. . . doesn’t look a very comfy spot Mila.

Scafell on the left and Symonds Knott with Illgill Head ???behind.


An impressive view of Great Gable.

Wow, I hope you’re not scared of heights! . . . Don’t step backwards . . . and for goodness sake open your eyes!

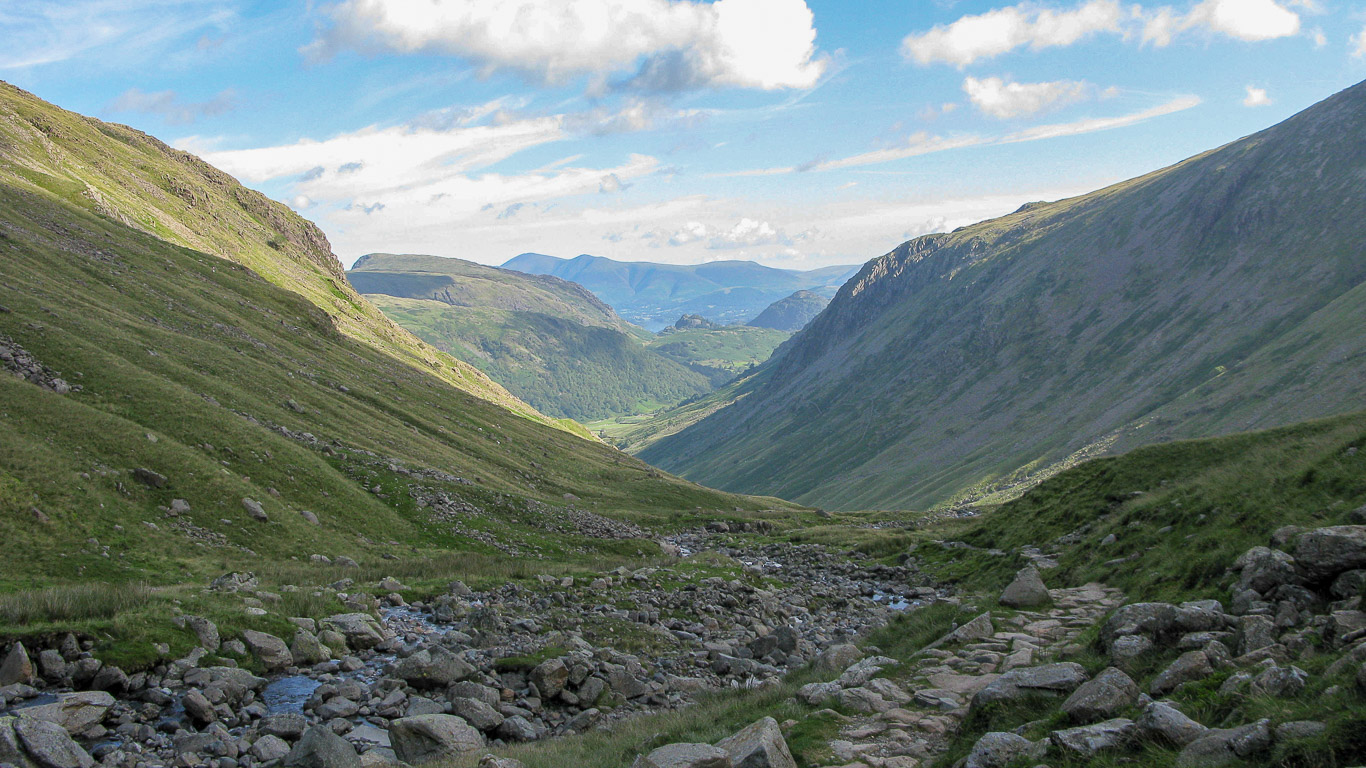
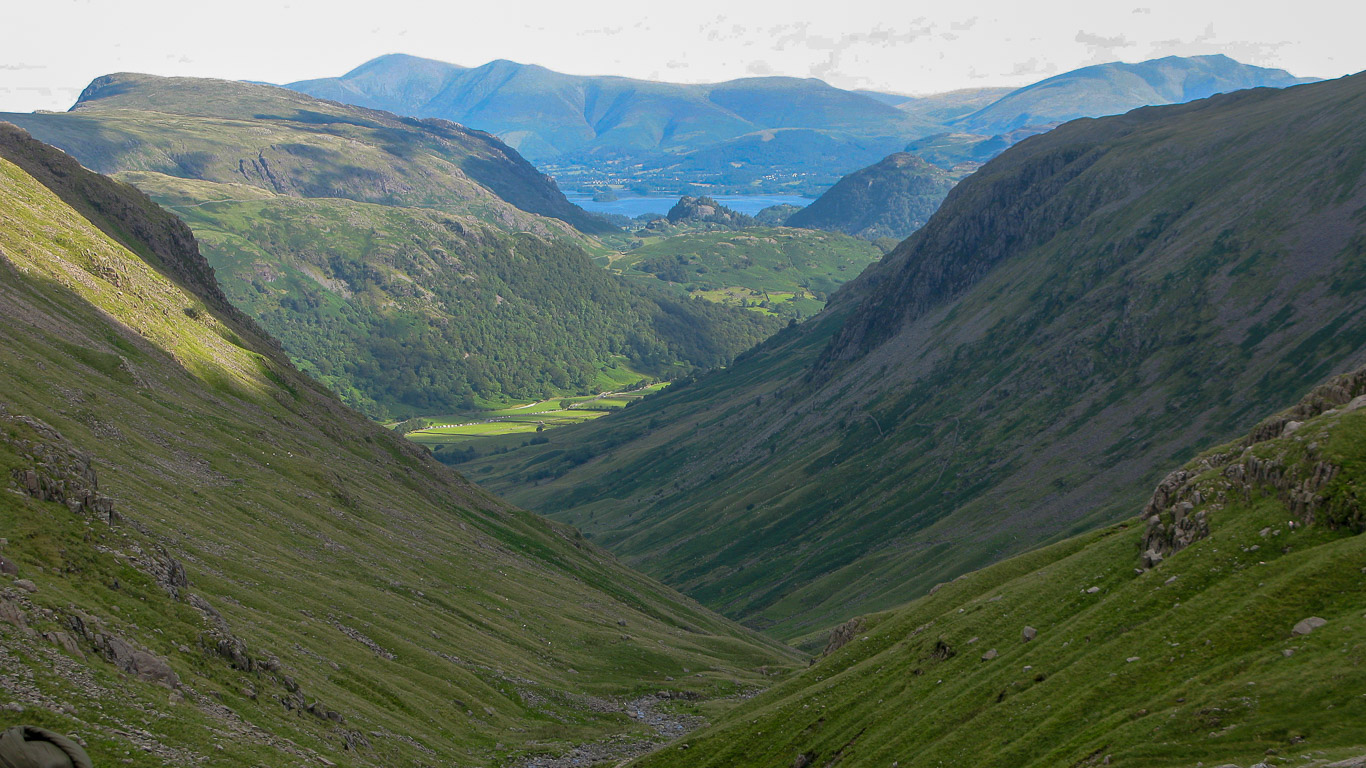
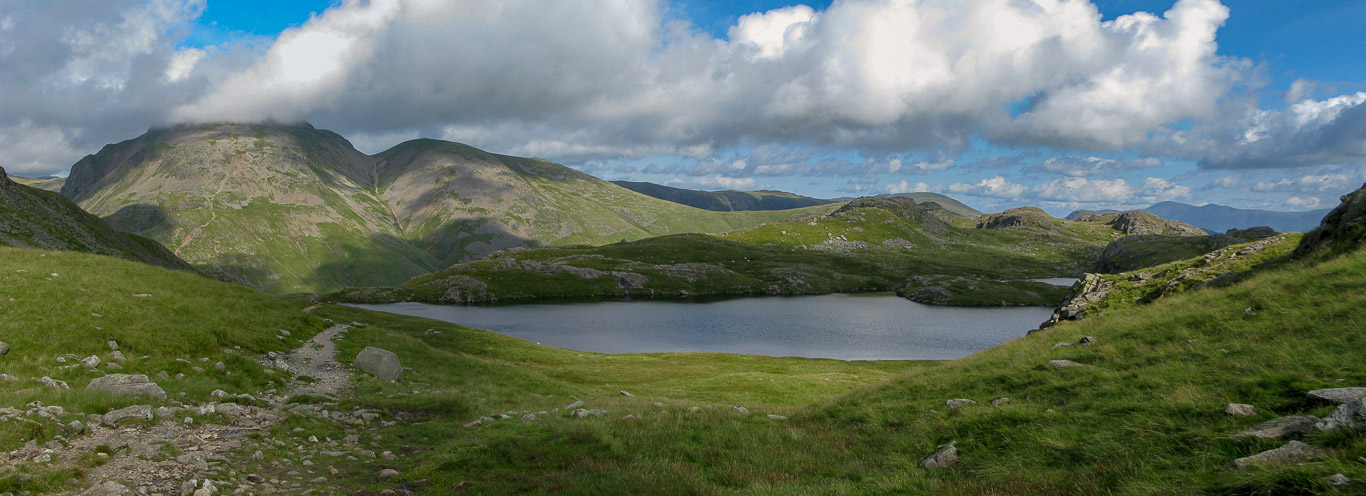
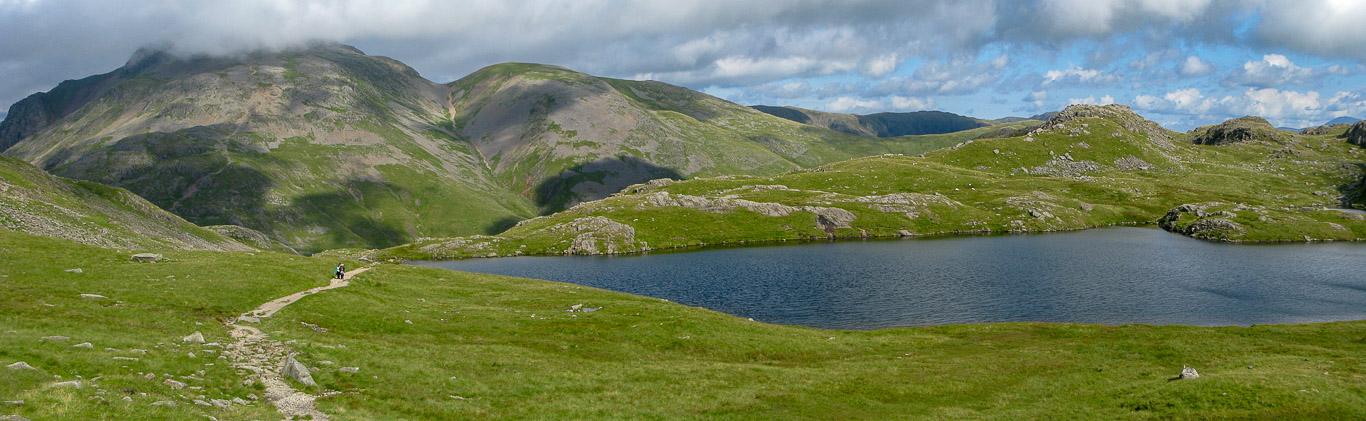
Looking across to the Northern fells beyond Derwent Water with Skiddaw and Skiddaw Little Man on the left and Blencathra on the right. Sty Head Tarn is below us now and that’s where we are heading now.

Mila catching forty winks while she waits for us to catch up with her.

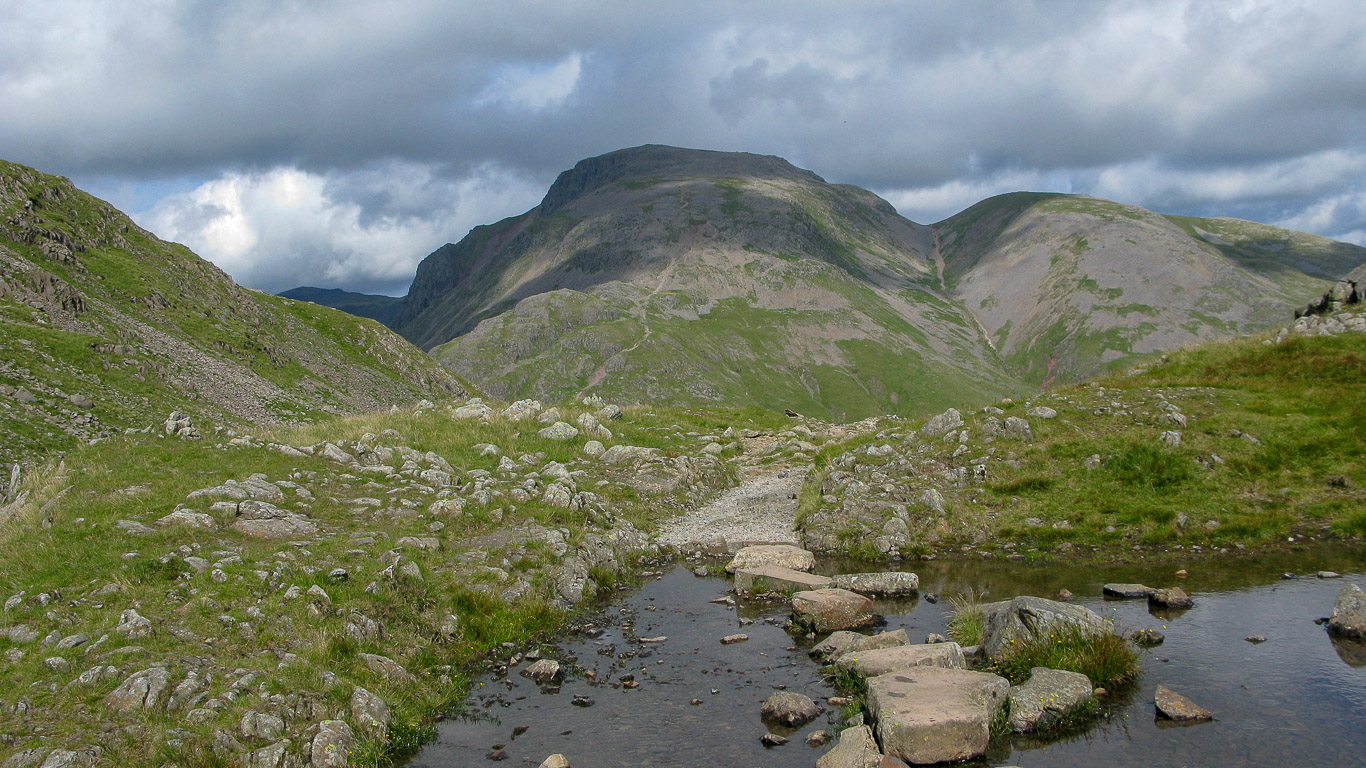
We descend intending to use the ‘Corridor Route” which as AW states [Scafell Pike 16 Book 4], ‘Links grassy shelves on the very rough western slope of Great End and Broad Crag and is, in fact, the one and only easy passage possible along this flank, which is deeply cut by revenues. It provides an excellent way from the Lingmell Col to Sty Head, interesting throughout . . .’

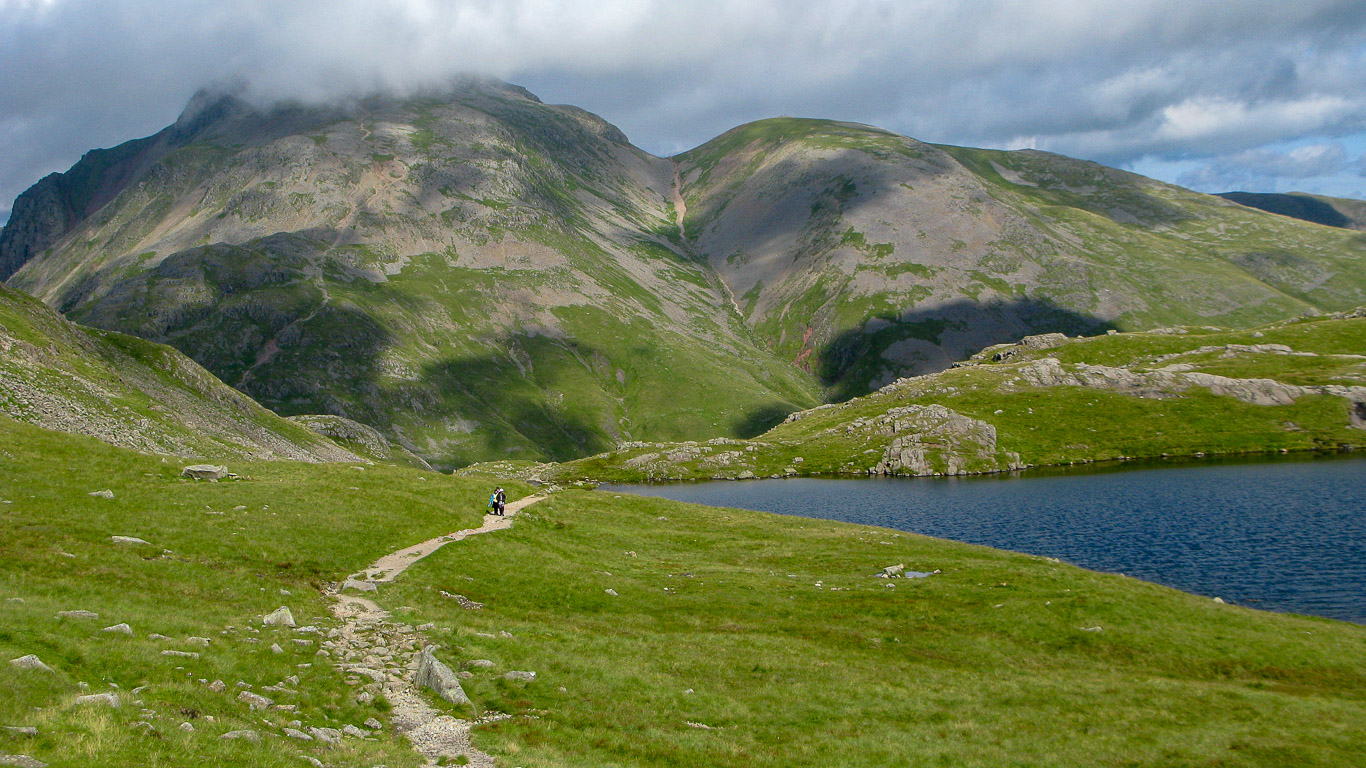
Styhead Tarn ahead with Blencathra in the distance.

It’s amazing how quiet it all becomes again once you’re down from the summit.

Looking back up to the summit of Scafell Pike.

The majestic sight of Great Gable.

On the left the slopes of Great Gable with the Northern Fells in the distance.


A clear path to follow.

The Northern fells are easily recognisable and are useful to orienteer yourself.


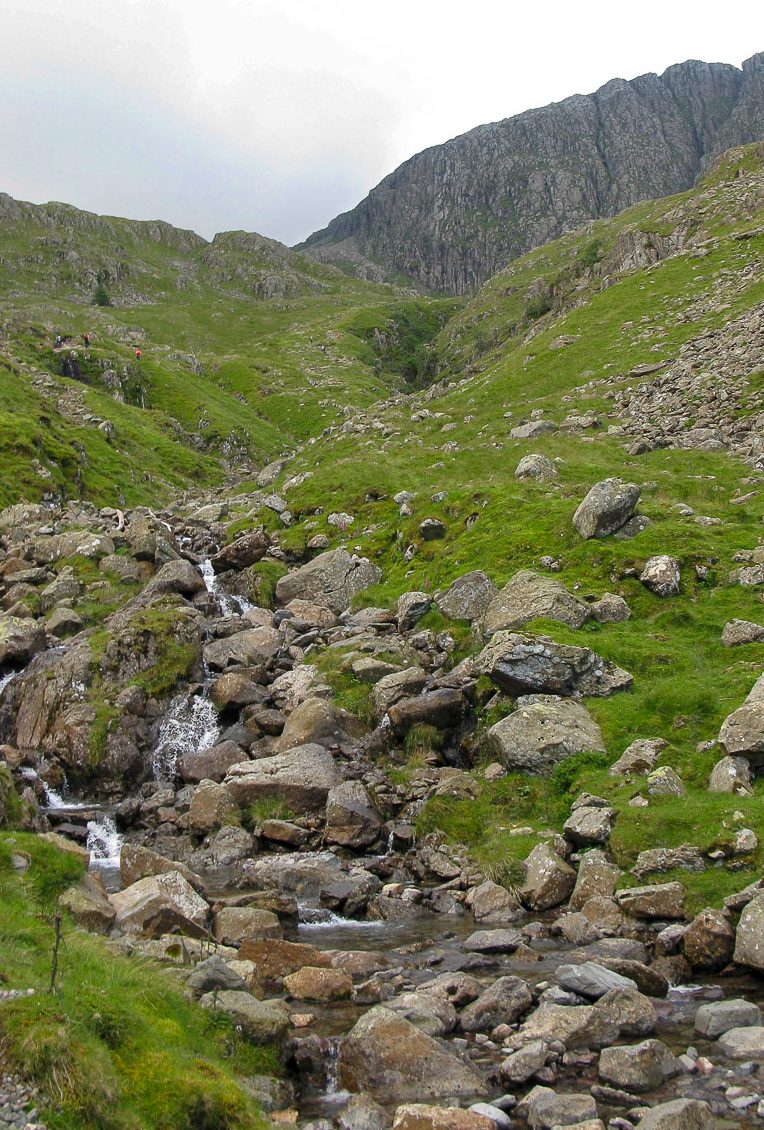
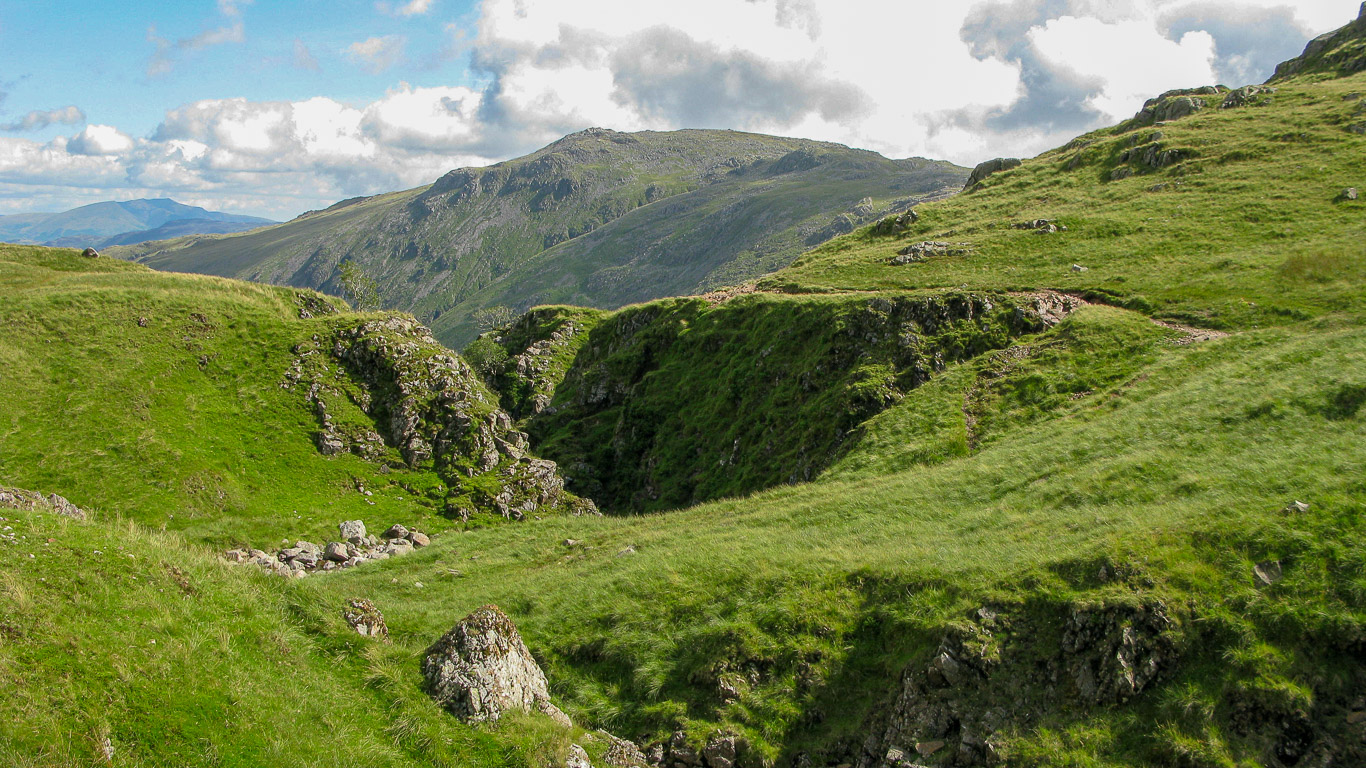
Piers Gill from the Corridor Route. The stream on this northerly side of Scafell Pike has cut a deep groove into the fell side as it cascades down; there’s no path down there . . .


Mila with the Northern fells (Blencathra just visible on the far right) behind.

Looking back.

The route is pretty easy to follow, much of it being laid out with big stone steps and lots of cairns along the way.

You can just about see walkers on the path ahead.


Following the Corridor Route down to Sty Head Pass and tarn. It’s fairly straight forward but a very steep descent.

This path joins up the masses walking up from Wasdale as they ascend the final track to the summit of Scafell Pike

The route was quite tricky in places but not too bad and you can see why it’s called the Corridor Route.

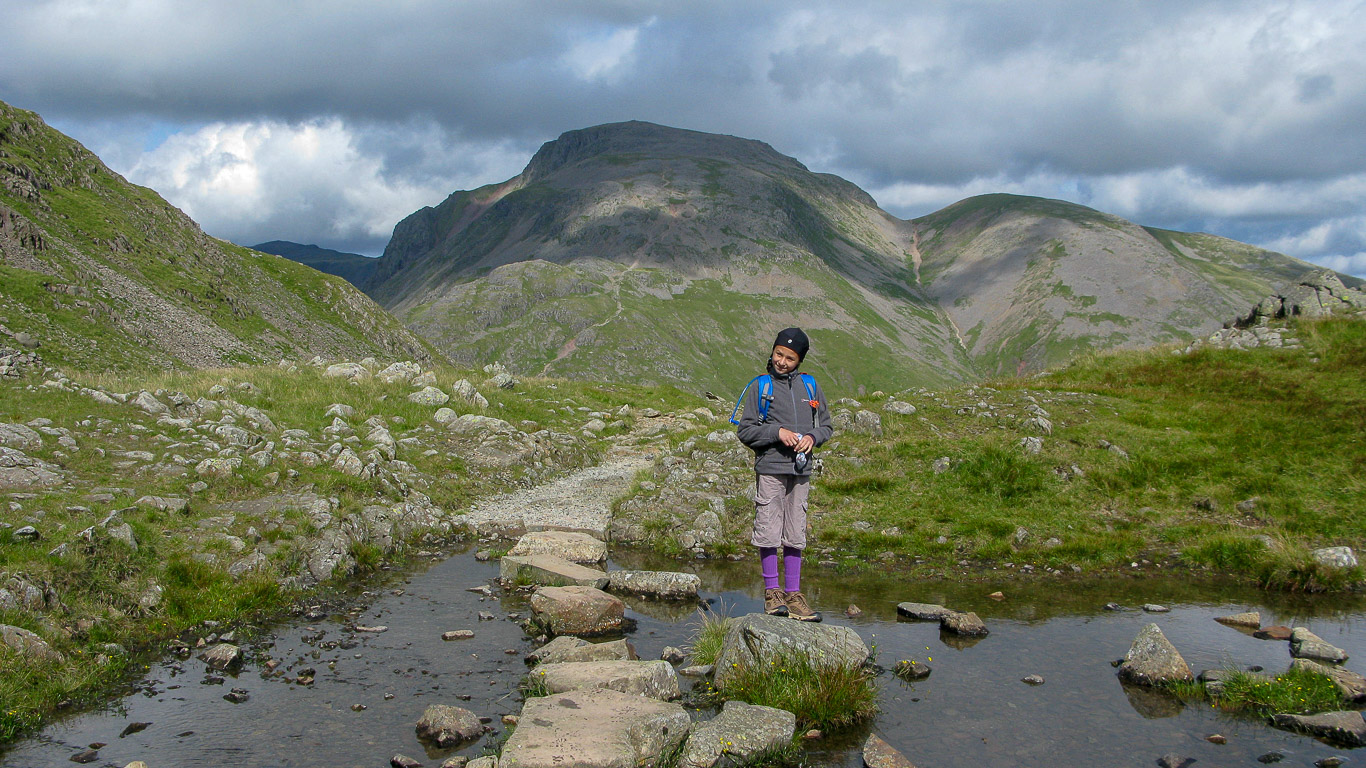
Pal, almost down to Styhead Tarn. Base Brown is just behind Pal.

A very clear path to follow.


Now it’s time for Pal to have a rest . . . by this point your knees are definitely feeling it!

Looking back the way we’ve descended – Broad Crag in the centre with Scafell Pike off to the right.

A feeling of achievement by us all.


We ended up keeping to the right and headed back to Stockley Bridge but it would have been interesting if we had gone through the trees to Taylorgill Force waterfall back to Seathwaite farm.

Busier now at Stockley Bridge . . . not far from here back to Seathwiate Farm and our car. We’re all pleased with ourselves having climbed the highest of Wainwright’s 214 Lakeland fells!
