A longer walk than expected but well worth it! From Stoneycroft up Causey Pike via Rowling End then following the ridge route to Scar Crags; Sail and Eel Crag (Crag Hill) before returning via Force Crag Mine and the mine road to Braithwaite 12th August 2017.

WAINWRIGHT BOOK: The North Western Fells Book 6
DIFFICULTY: 3 WALK LENGTH: 7hrs 15mins including lots of rests and lunch stop.
DATE and START TIME: Saturday 12th August 2017 Start time 12.20pm – Finish time 7.35pm
PARKING: Roadside parking spaces at Stoneycroft Braithwaite (NY 233 217)
ROUTE WALKED: Stoneycroft roadside (near Uzzicar Adventure Activities) – Rowling End – CAUSEY PIKE – SCAR CRAGS – SAIL – EEL CRAG (CRAG HILL) – down via Coledale Beck and Force Crag Mine and along the Mine road to Braithwaite and back to the car.
WALK DETAILS: Stoneycroft 9.7 miles, 7hrs 15 mins, ascent 2788ft.
HIGHEST POINT: Stoney Eel Crag (Crag Hill) – 840m/2756ft.
WALKED WITH: Pal and Mila (aged 14).
WEATHER: After a very wet morning the forecast said the rain was supposed to clear . . . and it did, resulting in a fabulous afternoon.
Parking up . . . (I wonder where those people in the background have been swimming?).
There’s Catbells and Maiden Moor in the background. The walk ended up being surprisingly quiet despite all the cars, no doubt the torrential rain in the morning had put people off, Wainwright had warned of heavy summer traffic with it being such a popular route.

We decided to take the old miners track up past the cars . . . (this should have been our return route . . . mmh, see later . . . . I really should check the GPS more, but when there’s a really obvious path . . . excuses, excuses). Anyway, there’s Rowling End straight ahead and the route we’re going to follow up to the summit of Causey Pike and on the right of the photo are the slopes of Barrow.

Rather than walking up here, we should have just walked along the road south, past the cars and over the Stoneycroft bridge, though we did get some great views and it did whet our appetite for what was ahead.
A great view of Skellgill bank leading to Catbells . . .

. . . and a view of our first summit, Causey Pike, which looked stunning, covered in beautiful purple heather, with it’s very easily identifiable bobble summit.

So we ended up walking up the miners track, just to return to the road further along . . .The way we should have gone! The real walk starts across the Stoneycroft bridge over Stoneycroft Gill, the path is just past the bridge on the right.
 We did’t continue along this obvious path, which is a more direct route up to Sleet Hause and the summit of Causey Pike. Instead we took the fork off to the left, favouring the route up Rowling End, though steeper it is said to boast spectacular views.

Here’s Mila pointing out the route up Rowling End, she’s crazy but we love her! She’s obviously feeling the heat unlike Pal.

Opposite is the miners track following the base of Barrow. Grisedale Pike is the summit in the centre of the photo.

Barrow from Rowling End.

The path up Rowling End heads towards the low rocks of Ellas Crag then continues above them.

The views . . . are certainly spectacular!
The Northern Fells (from left to right): Unlock Pike; Long Side (with Dodd in front); Skiddaw; Skiddaw Little Man; Lonscale Fell; then on the far right Blencathra with Latrigg in front. In the centre of the photo is Swinside covered with conifers and Swinside inn the white building at the base of Swinside on the right. There’s Derwent water and Keswick below Latrigg.

Further east to south and higher now, there’s Derwent Water with Keswick beyond on the far left of the photo with the North Pennines beyond.
Catbells, is the first fell in the centre of the photo then in the middle distance (beyond Catbells) is Walla Crag leading to Bleaberry Fell and High Seat (both covered with heather). Beyond Walla Crag, looking golden with a darker summit is Great Dodd; then moving right you have Stybarrow Dodd; Sticks Pass; Raise; then the distinctive triangle shape of Catstycam (behind High Seat); Helvellyn; Nethermost Pike; Dollywaggon Pike and Great Rigg!

South east to south: The Newlands Valley at the base of Rowling End with the Newlands Pass (Hause) the mountain pass which links the Newlands Valley to the west of Keswick and Derwent water, with the village of Buttermere.
The fells from left to right: Maiden Moor (which is further along the ridge route from Catbells); High Spy (further along the ridge route from Maiden Moor); Glaramara; Dale Head and on the far right of the photo you can just see the beginning of Hindscarth.

The fells from left to right are: Dale Head (just visible); Hindscarth; with Kirk Fell in the dip between Hindscarth and Robinson. Robinson leads down to High Snockrigg and beyond is High Stile; Red Pike then Whitelelss Pike and finally Ard Crags (the first part of the ridge is Aiken Knott) rising up from the Newlands Valley. Ard Crags leads on to Knott Rigg though you can’t really see it in the photograph.

Our first summit, Causey Pike ahead with the ridge route leading to Scar Crags and Sail all of which we planned to walk (with the dark fell beyond being Wandope). Ard Crags is the fell to the left.

On the other side (west) of Causey Pike you can see Grisedale Pike in the middle and Outerside to the right.

The heather is so vibrant, like a thick pile carpet of colour. Here you can see the ridge route that we would be following and not a soul in sight except Mila waving . . . how did she get to be so far ahead already? You can see that the final route to the summit is quite steep and does involve a little scramble at the top but it isn’t actually as difficult as it looks.
Left to right: the slopes of Ard Crags; Whiteless Pike is just visible; then Wandope; Sail; Scar Crags and our first summit of the day, the distinctive summit of Causey Pike.

Along the ridge of Rowling End . . . heading for the last steep section before the summit.

Is it time for a rest?

No space for me I see!

Little did Mila know but this was barely the beginning of the walk . . . Luckily Mila wasn’t as tired as she looks here; she was actually hiding from the clouds of black flies that you can just about see in the photo. Fortunately they were only a problem for a short way.

Mila was none too keen on those tiny flies which accounts for Mila’s covered face and speed of movement. Fortunately they were only around here and it was a relief to leave them behind along with Mila’s continual moaning about them!

You can just about see someone on the summit.

The summit of Causey Pike.
Mila could not be convinced that there were no more flies . . . . The ridge route that we would be following across Scar Crags, Sail to Eel Crag.

Causey Pike summit with the Northern Fells ( the distant isolated fell is Binsey) and Derwent Water. The views were extensive and already it’s a firm favourite walk.
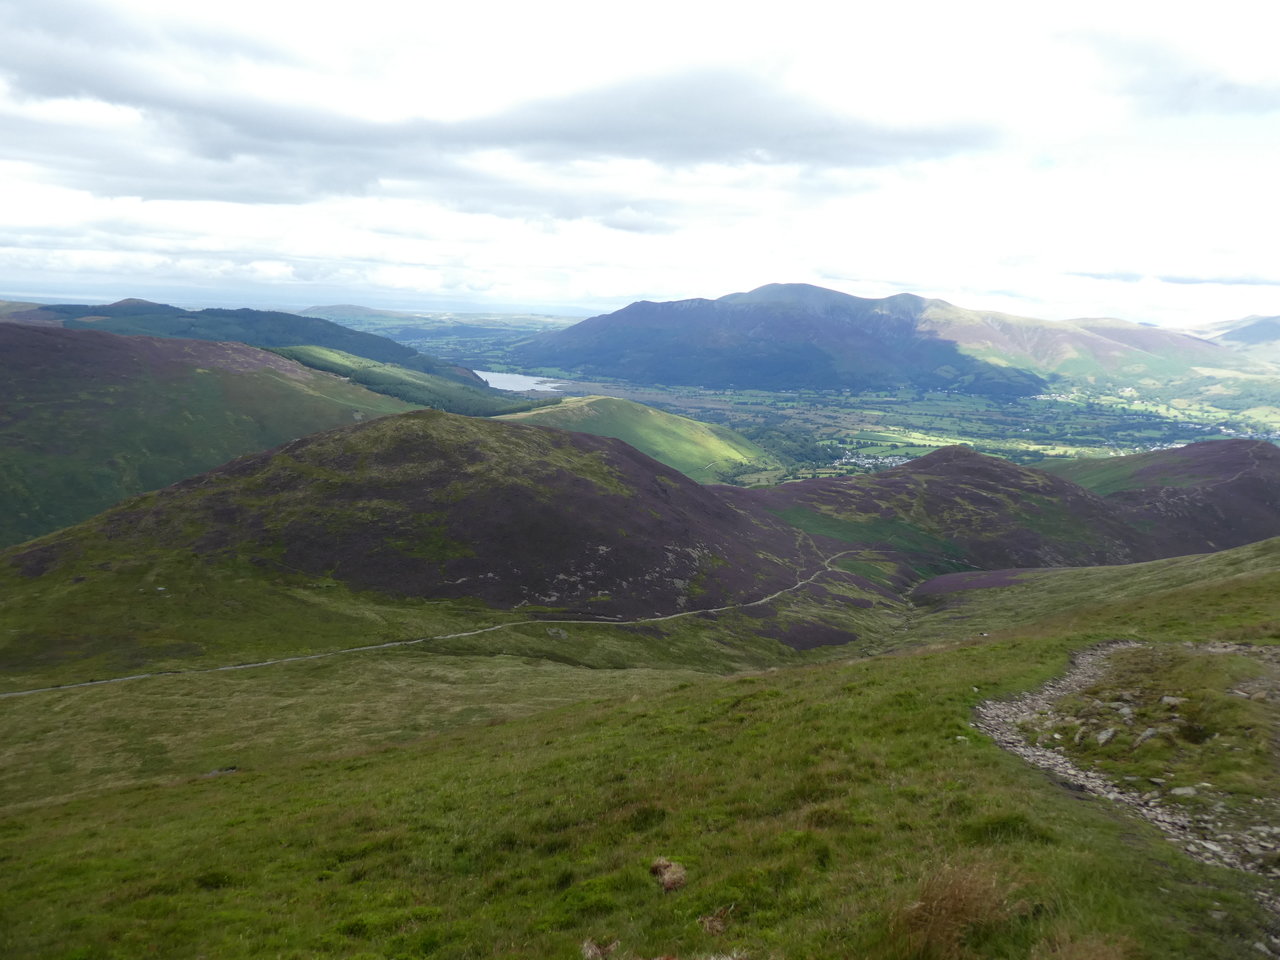
Wonderful colours. There’s Stile End below covered in patches of heather, the ridge leads left to Outerside and right to Barrow out of the photo) and Braithwaite village below with Bassentwaite Lake.
We would end up coming back by the wrong miners track which follows Coledale Beck, you can just about make out the track at the base of the green fell which is in fact Kinn which leads to Grisedale Pike. We should have returned by Outerside and Barrow! Beyond Kinn, is the conifer covered Revelin Moss, Whinlatter.

Looking back along Rowling End from the summit of Causey Pike east to south across to Catbells then beyond Derwent Water to Bleaberry Fell and beyond to the Helvellyn range (the Eastern Fells).

Catbells and Maiden Moor with the Helvellyn range behind (Stybarrow Dodd; Sticks Pass; Raise; White Side; Catstycam; Helvellyn; Nethermost Pike; Dollywaggon Pike; and Great Rigg).

The Newlands Valley with Maiden Moor and High Spy then beyond from left to right you have Ullscarf; High Rise; then just visible you have the peaks of Wetherlam and Bowfell; followed by Glaramara; Esk Pike and King’s How.

The prominent fells in this photo are Dale Head; Hindscarth and Robinson.

The ridge route ahead across to Scar Crags; Sail; Eel Crag down to Coledale Hause. White side is just visible behind the dip of Coledale Hause and further to the right is Hopewell Head and Grisedale Pike. We planned to head down at Coledale Hause.

Mila and Pal getting ahead while I stop to take shots. (Coledale Hause is the dip in the centre of the photograph).

I really love the colours in the photo below. Really beautiful and so peaceful, we didn’t see any other walkers for quite a time.

Looking back at Causey Pike. Wainwright (Book 6 The North Western Fells) describes the summit of Causey Pike as a narrow crest undulating over five distinct bumps, the most prominent being the one terminating so abruptly at the eastern end of the crest; this is the rocky knob that identifies Causey Pike unmistakably in distant views of the fell. (Causey Pike 6). The walkers you can see turned back at this point and so we had the whole place to ourselves.

Pal and Mila approaching the summit of Scar Crags, I’d better hurry up and stop with all the photographs! Ahead is our route.

The Whiteside Ridge, Sand Hill, Hopewell Head and the Hobcarton Ridge towards Grisedale Pike (on the right of the photo) with Force Crag Mine, Coledale below.

A close up of the disused Force Crag Mines in the Coledale Valley were the last working underground mines in the Lakes. They started as lead mines and ended up by extracting Barites and other minerals. They closed for good in 1992. They are now owned by the National Trust who occasionally allow guided tours of the mines. (Roger Hiley went on such a walk which you can find if you put a search in his website for Force Crag Mines tour. Roger and his wife Ann’s website is a real must to follow for anyone interested in the Lakes! http://Loweswatercam.co.uk

Below is the route we should have followed. We should have descended on the other side of Outerside where, to be fair, there isn’t any obvious path and either climbed Outerside or circumnavigated the base till we got to the clear miners path you can see in the photo! Instead we ended up remaining in the Coledale Valley adding to our walk!
Yikes, Pal and Mila really are getting ahead – now can you understand why I didn’t check the GPS?

Scar Crags with Pal and Mila mere specks in the distance. Beyond Scar Crags you can see Sail with its engineered path and Eel Crag, our final summit for today, before we descend via Coledale Hause.

Mila arriving at the summit of Scar Crags.
The summit of Scar Crags

Sail, our penultimate summit for today. Fix the Fells have sorted out the problem of erosion by making a very artificial zig-zag path up the side of Sail; it’s such a shame that it’s so visible and so out of keeping but maybe in a few years it won’t look like such a scar on the side of the fell.

Looking back at Scar Crags. The path you can see down on the left would take you back to the car.

Another look back at Scar Crags this time from the slopes of Sail with the summit of Causey Pike and Rowling End in the distance and the Newlands Valley spread out below and then Catbells, Derwent Water and the North Western, and Central Fells. Outerside is on the left of Scar Crags with the Northern Fells beyond.

Sail summit.
 Eel Crag, ahead, our final summit for today.

Time to stop and admire the view, and eat a very late lunch!

Quite a steep final climb, my legs were definitely feeling it by this point.

Can you believe someone was mountain biking down Eel Crag with their dog as another group of walkers looked on in surprise. It looked totally terrifying to me . . . it was quite enough effort to walk up but imagine going head first down on a bike, I hope he has good brakes!

Mila on the summit of Eel Crag waiting for us oldies to catch up with her, she’s got a bit of a wait, we’ve really slowed down by this point.

It’s a shame it turned out to be such a dark photograph but it shows the whole route of our descent to Braithwaite. If only we hadn’t crossed Coledale Beck but had instead traversed the slopes of Outerside we would have been back to the car ages earlier.

Mila on the Ordnance Survey column on the summit of Eel Crag (known as Crag Hill on OS maps). Any suggestions for a caption? What about, “Do I pong a bit or is it something in the air?” – Only kidding Mila.

Mila has finally lost the plot . . .

The very flat summit of Eel Crag.
The best views are to the north and east where the nearby edge of the summit falls away sharply to reveal a magnificent prospect of the Keswick area, seen over the descending east ridge. The Helvellyn, Skidded, Scafell and Pillar ranges are all fully displayed. This is a view of mountains, not lakes (Wainwright Eel Crag 11).

Looking back at our route over Sail, Scar Crags and Causey Pike.

Amazing views across to Keswick and beyond. The fells to the left are Outerside, Stile End and Barrow. Blencathra is in the distance on the left of the photograph.

Pal and Mila on the summit of Eel Crag (Crag Hill) with Whiteside in front, further to the right out of the photo is Hopegill Head.

Heading down to Coledale house with Sandhill and Hopewell Head in front and Whiteside going off to the left on the photo.

Grasmoor and Whiteside from Eel Crag.

Pal and Mila descending to Coledale Hause, with Grisedale Pike, which we’ll save till another day on the right.

We ended up coming down this scree slope in a rather hairy scary fashion! I think the real route was further along – we went for the dramatic direct route (I was following the GPS a little too closely at this point!). It doesn’t look nearly as vertical as it felt coming down it!

I think this is the route we should have used rather than the very steep scree route on the left which we came down on.

Heading down now, there’s the summit of Grisedale Pike ahead.

Looking back at Eel Crag.

This is where we should have been heading . . .

. . . instead we headed straight down into the Coledale Valley!

A clear path to follow but a moment’s thought on my part and I would have realised that we needed to be heading right to return to the valley between Outerside and Causey Pike!


Force Crag Mine in the Coledale Valley. We ended up following the miners track into Braithwaite.

Coledale Beck with Pudding Beck flowing into it on the right.

A row of stepping stones made the crossing easy.


Looking back.

A rather weary walk along the miners track into Braithwaite though there was a short cut path further along on the right.

Braithwaite ahead, not far now.

A bit of a road walk . . . not much further, honestly.

Finally, back to the car, what an amazing walk.
