A great walk though the first half was hampered by poor visibility . . . it just means we’ll have to do it again when the views are clearer. Quite an achievement with eight Wainwright fells having been climbed – all in one day!
WAINWRIGHT BOOK: The Eastern Fells Book 1
DIFFICULTY: 3 WALK LENGTH: Full day
DATE and START TIME: Friday 12th August 2016. Start 8.40am
PARKING: Near the entrance to the hotel attached to The Badger Inn (NY 362 057) as there were cones preventing us parking on the road leading to Rydal Mount where we had intended to park.
ROUTE WALKED: Rydal Mount, NAB SCAR, Lord’s Crag, HERON PIKE, GREAT RIGG, FAIRFIELD, across Rydal Head, HART CRAG, DOVE CRAG, HIGH PIKE, LOW PIKE, High Brock Crags, High Sweden Coppice, Low Sweden Bridge, Nook End Farm, past the Cumbria University and into Ambleside & then refreshments at The Giggling Geese Cafe, before walking along the A591 back to where we had parked the car..
WALK DETAILS: O.S Map OL7. – c.11.2 miles, c.7hrs 30mins
HIGHEST POINT: Fairfield 873m/2864 feet.
WALKED WITH: Pal and Mila (aged 13).
WEATHER: Low cloud, drizzle, rain, pea soup (Mila says I need to explain what I mean by ‘pea soup’ but I think you’ll get the meaning when you get to it!), clearing on the descent, even some sunshine!
We parked the car here as we couldn’t park on the road leading to Rydal Mount.

Mila setting off ahead of us as usual. We turned left here towards Rydal Mount, (where the poet William Wordsworth lived from 1813 to 1850) and Rydal Hall.

Next time I’d really like to visit Rydal Mount but as it was the beginning of a long day’s walk, with eight Wainwright fells to be bagged, and it was already incredibly busy with coach loads of Oriental visitors we gave it a miss.
 Opposite Rydal Mount is Rydal Hall, a great place to stop for refreshments, but not today!

The Coffin Route links two of Wordsworth’s homes, Rydal Mount and Dove Cottage (in Grasmere) where he lived between 1799 and 1808; but it’s not the way we’re heading today!

Today we’re heading for Nab Scar, the craggy hillside overlooking Rydal Water, the first fell on our route to complete the Fairfield Horseshoe. It’s a very clear path to follow at the beginning of our busy day.

This is today’s route, from the south, you can see that it forms a clear impressive horseshoe (AW Fairfield 3). A fantastic walk covering eight Wainwrights in one walk!

Nab Scar finally comes into view with Mila out in front! Nab Scar is part of the long southern ridge of Fairfield.

An easy route to follow . . .

Over the ladder stile with the dog hole to the side, and there’s Nab Scar ahead, and the start of the high level walking.

Looking back the way we’ve walked, following the stone wall, it’s a real shame it’s such a cloudy day, and it gets worse, before clearing impressively!

Rydal Water (with Heron Island the larger of the islands) can just about be seen from Nab Scar as cloud descends. On a clear day you can see Rydal Cave (a quarry cave) on the fell opposite.

Mila up ahead barely visible now, and views are pretty non-existent.

We can only see a few feet ahead of ourselves now . . .
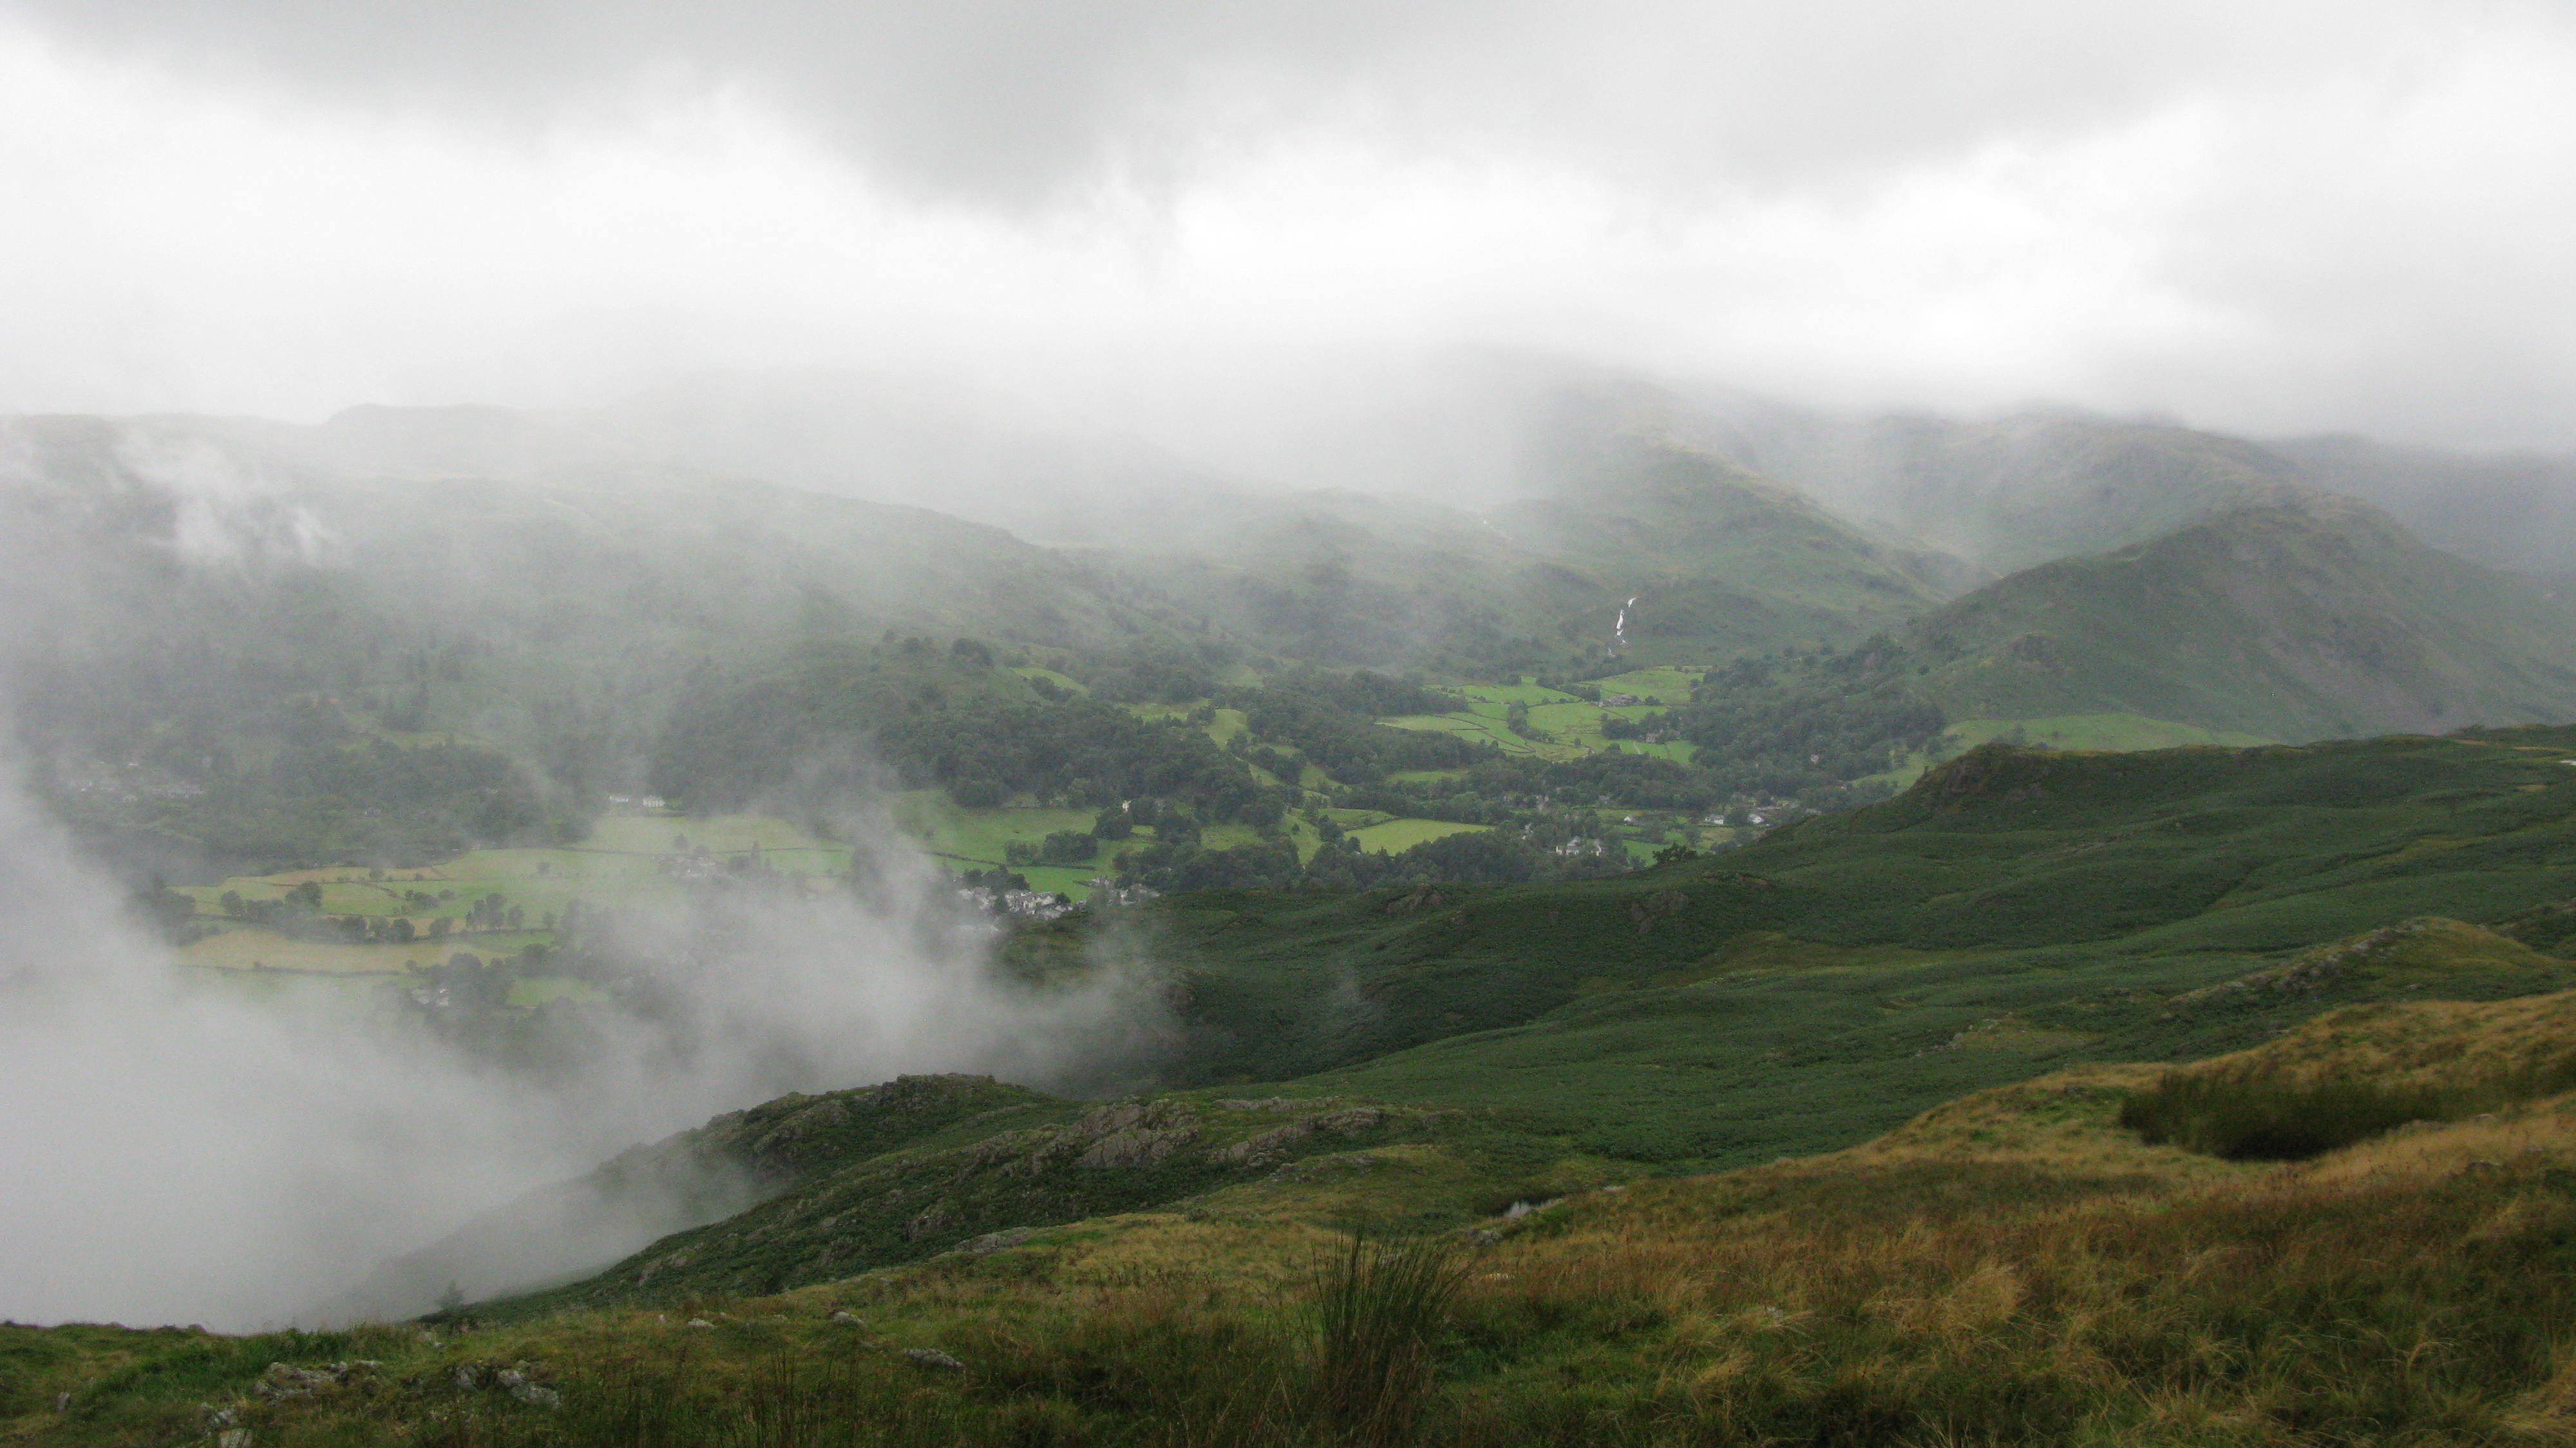
It looks really eerie with the mist rising over Grasmere Lake and the fell side, we had seen no other walkers at this point and it had an almost other world feeling.

Onwards and upwards . . . heading for Heron Pike. (The name Heron Pike has in fact, nothing to do with herons but, according to Mark Richards, means ‘peak of sea eagle’s eyrie’; Heron’s Island on Rydal Water on the other hand actually does refer to the nesting site of the grey heron!)

Mila adding a stone to the cairn on, I think, Great Rigg, which had a very interesting number engraved on one of the stones, I wonder what it referred to?

What could 1450 refer to . . . ? I’ll probably never know as I can’t find any reference to it in the guidebooks.

You can see the weather is changing for the worse, not much in the way of beautiful views today!

On the right of the photo you can see Helm Crag leading to Gibson Knott with, I think, Silver How on the left.
It’s been a fairly steep walk up and there’s still quite a way to go.

Up and up, and no other walkers in sight.

It looks like the stone wall has been reduced to a pile of rocks, I wonder whether someone is going to use it to continue the stone wall?
Onwards and upwards.

The view on the fell has cleared but the same can’t be said for the surrounding fells.
A clearer view of Helm Crag leading to Gibson Knott. (I’ve used a panorama stitcher programme which accounts for the grey line!)

Grasmere Lake. On a clear day we would be able to see over Grasmere to Crinkle Crags and Bowfell!

Looking back at the way we’ve walked – shame about the lack of views!

Grasmere Lake. Views from Nab Scar.

The clouds lift for a moment to show Ambleside and Lake Windermere in the distance (looking south).

Despite the weather there’s a fairly clear path the whole way, apart from on Fairfield where it does get rather confusing, so I was glad to have the Garmin GPS.

Stone Arthur on the left is lost to the mist. Great Rigg leading to Fairfield ahead, such disappointing lack of views!

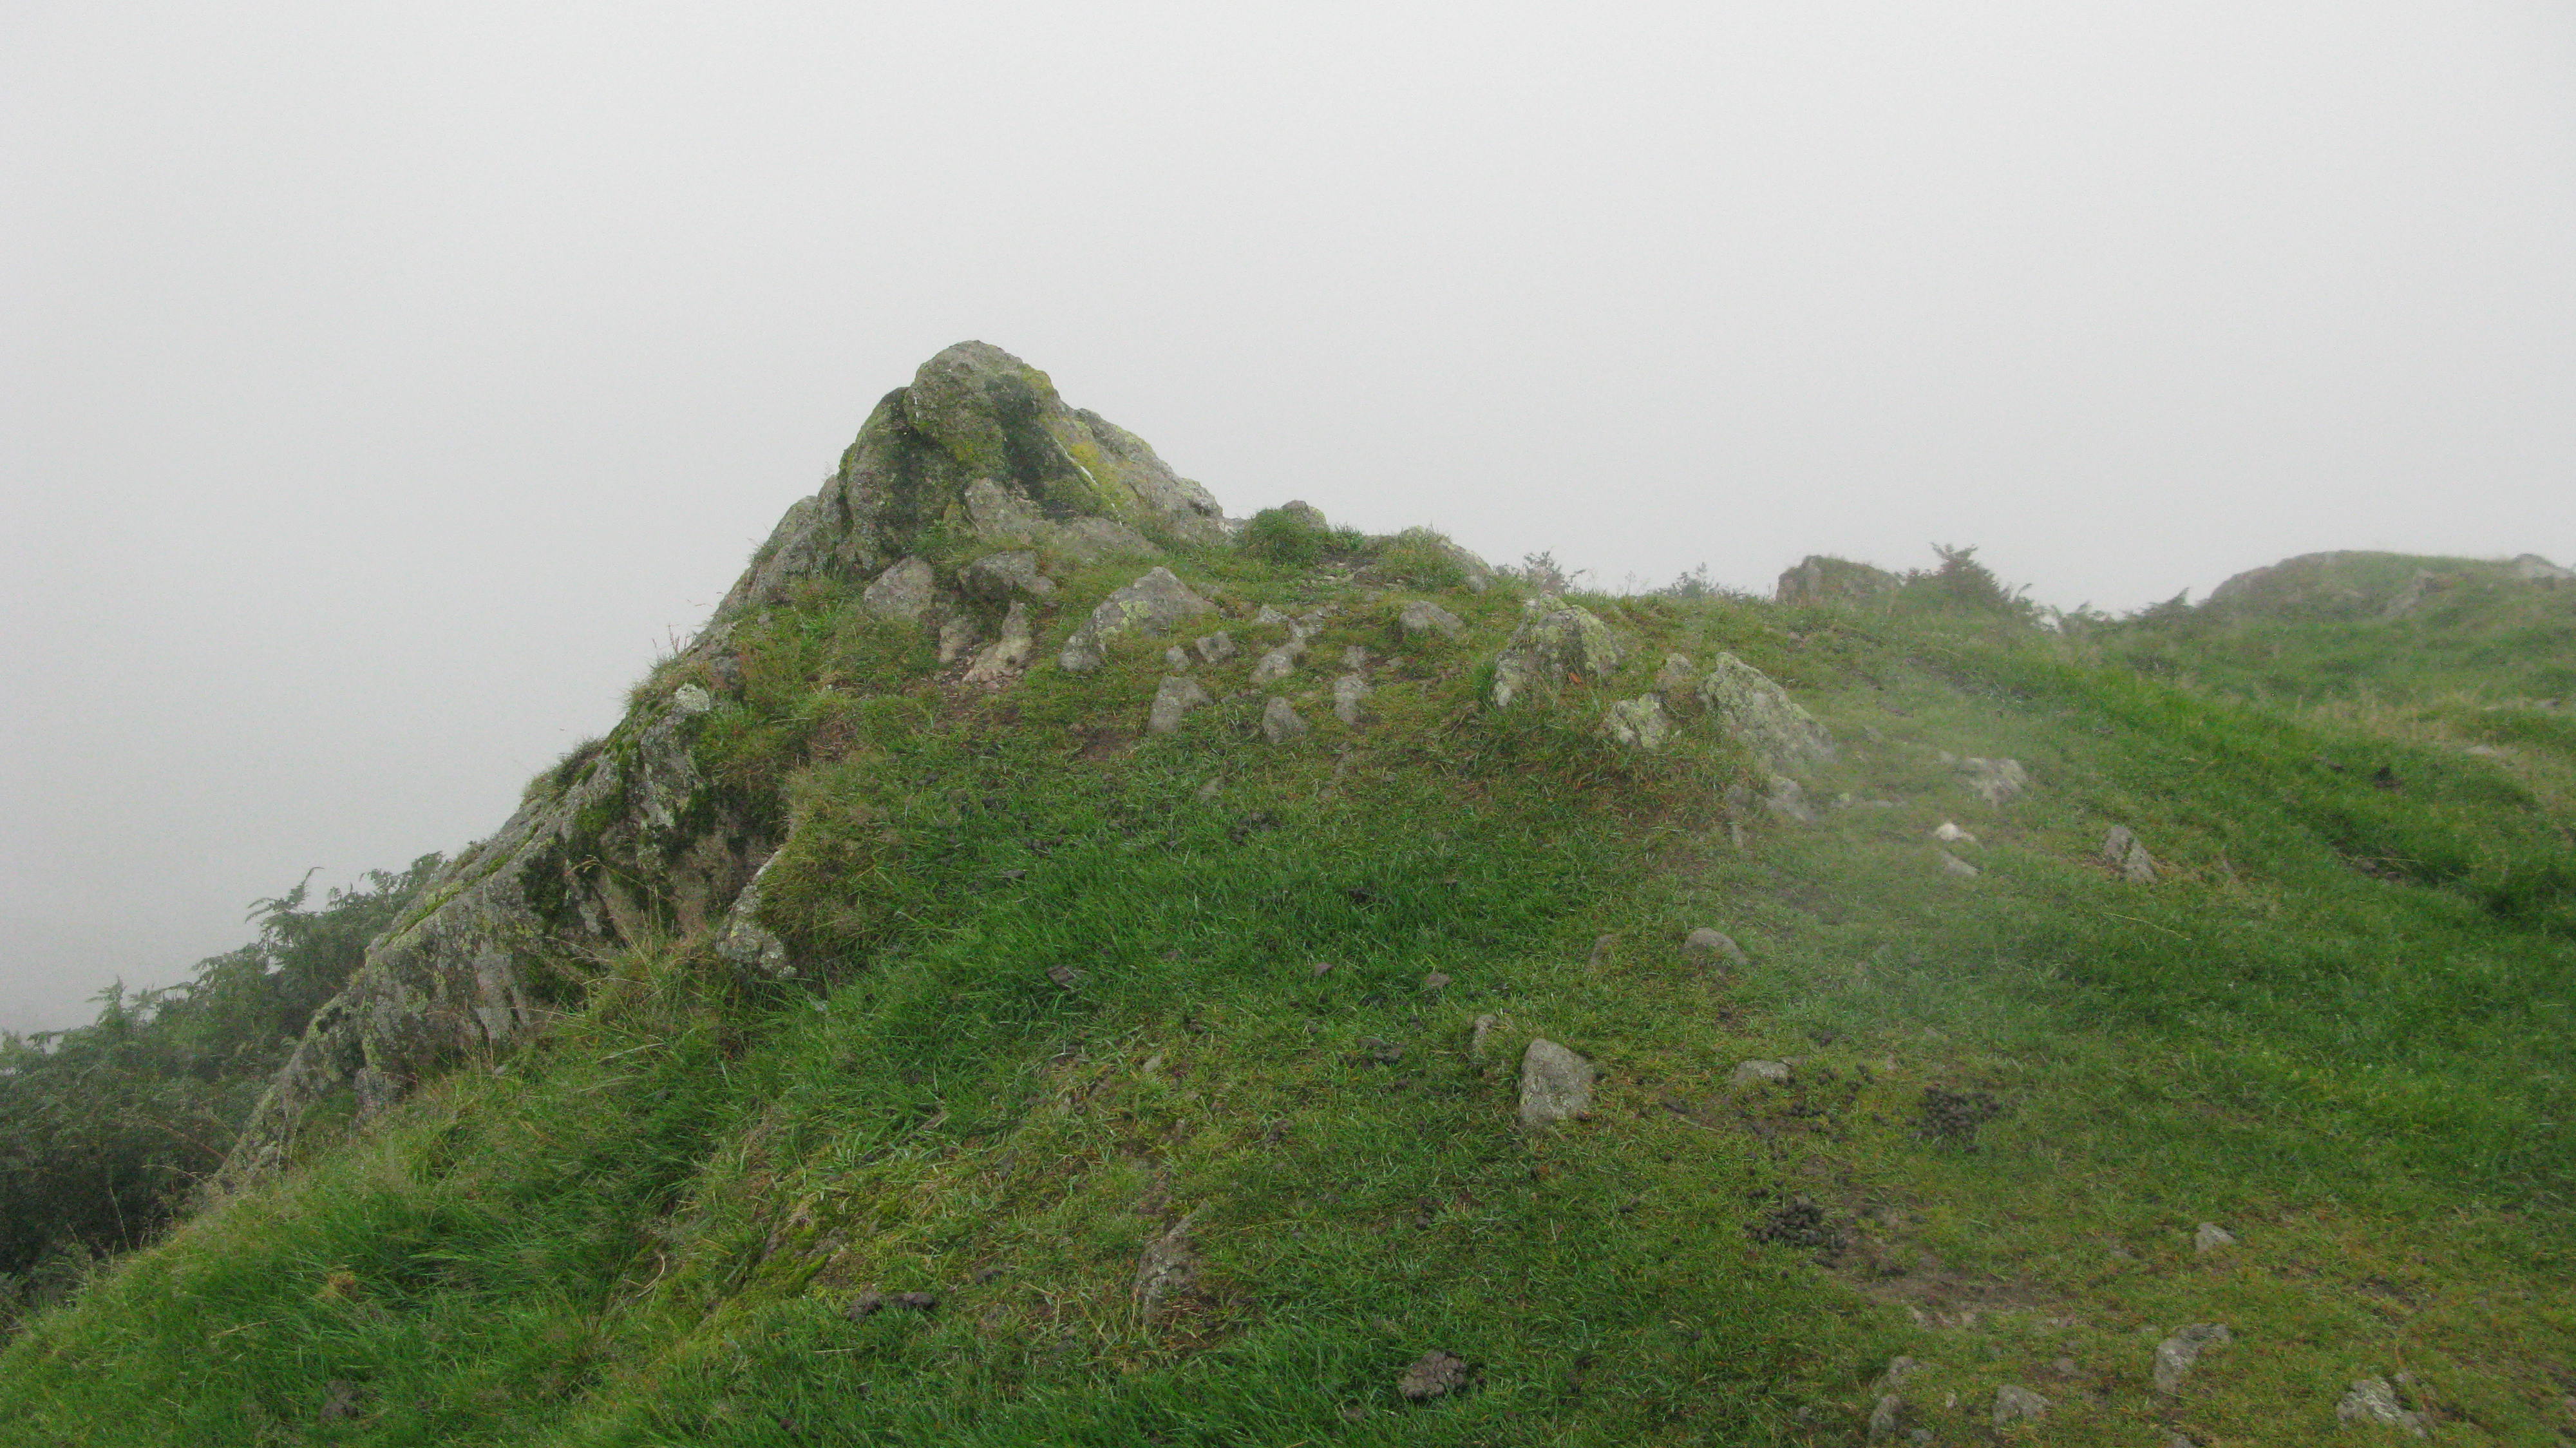
Still smiling despite the weather. Is this the summit of Fairfield or Hart Crag – who knows? As you can see the visibility is pretty poor.

Mila was so cold and wet that she had to get Pal to help put her gloves on. It’s hard to believe that on the following Tuesday (only three days later), I got badly sun-burnt on Blencathra!

Finally the clouds look like they’re really beginning to clear and the views are opening up. Now you can see pretty much the whole of today’s route. You can see on the right of the photograph where we started our walk from Rydal Mount up to Nab Scar, Lord’s Crag, Heron Pike, Great Rigg, Fairfield, across Rydal Head and our route of descent down to Hart Crag, Dove Crag, High Pike then Low Pike, ultimately down to Ambleside. The zig zag silvery line in the valley is Rydal Beck with Lake Windermere beyond. Claife Heights is the fell jutting out into Lake Windermere on the right. You can just make out Esthwaite Water, the small lake on the right.

The photograph below shows the route we have just walked finally appearing through the mist.

And this is the route we will follow back to Ambleside.

The top of Fairfield now the mist is clearing the views are beginning to open up.


How lucky are we that we got to see these views . . .

Magnificent! The route for our descent becoming clearer every moment.

A very happy Mila . . .


Admiring the views

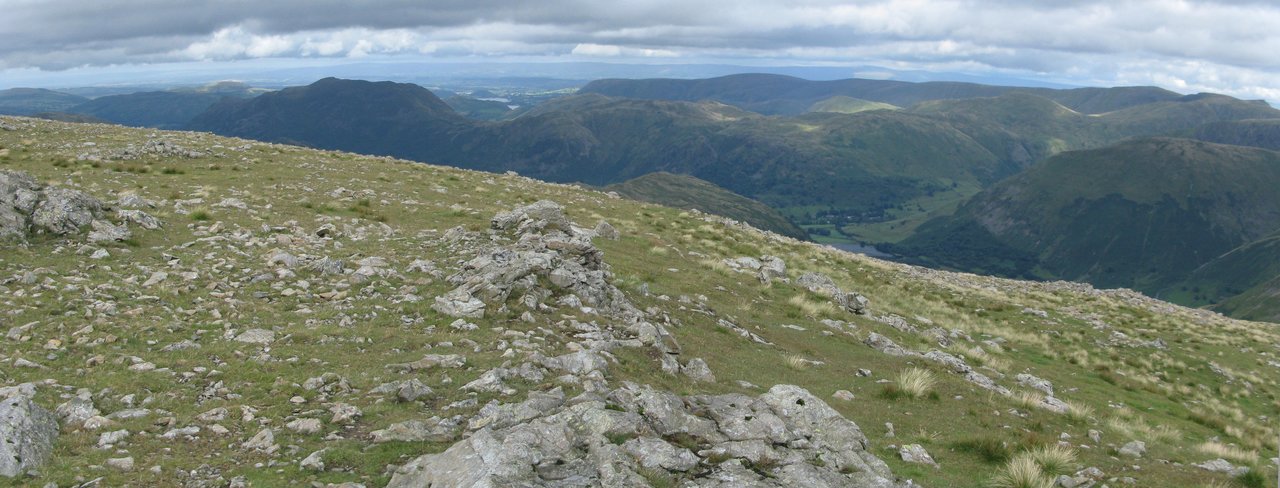
Looking north east. Just shrouded in mist is the summit of St Sunday Crag, the high point on the north-eastern ridge of Fairfield. From the flat summit of Fairfield a rough slope descends over the subsidiary top of Corfa Pike (completely hidden by the mist when we passed it by earlier as I had hoped to visit it for its views). From here the ridge leads on to Sunday Crag. The depression to the right of the summit from here is known as The Cape before Gavel Pike, the lower top is reached. Below Gavel Pike is the further top of Lord’s Seat. The fell to the right of St Sunday Crag is Place Fell with Beda Fell beyond the curving ridge of Place Fell. Beyond Beda Fell is Arthur’ Pike (the dark grey fell) with the ridge leading to Loadpot Hill, Wether Hill etc. To the right of Beda Fell is Angletarn Pikes and if you look very carefully you can see Angle Tarn and further to the right is Brock Crags. The valley is known as Deepdale with Hartsop above How (in front of Angle Tarn) and Greenhow End the slopes rising from the valley on the right.

Descending now . . . you can see Hart Crag ahead followed by Dove Crag on our route down the other side of the Fairfield Horseshoe.

We’ll follow this route all the way down to Ambleside.


Another photograph looking north east. Left to right the fells are: Place Fell; Arthur’s Pike (dark grey) with Loadpot Hill and Wether Hill and High Raise along the ridge; Beda Fell in front of Arthur’s Pike; then Angletarn Pikes and Brock Crags.

An impressive view now the cloud and mist have cleared.

Hart Crag ahead . . .


Hart Crag summit.

The summit ridge of Hart Crag is a mixture of splintered bedrock and grass.

Left to right the fells are: Fairfield and St. Sunday Crag, as you can see there are more walkers now but they’re doing the walk in the opposite direction to us. Beneath the cloud in the centre of the photograph is Helvellyn; Striding Edge and the distinctive triangular summit of Catstycam.

More views looking north to east.

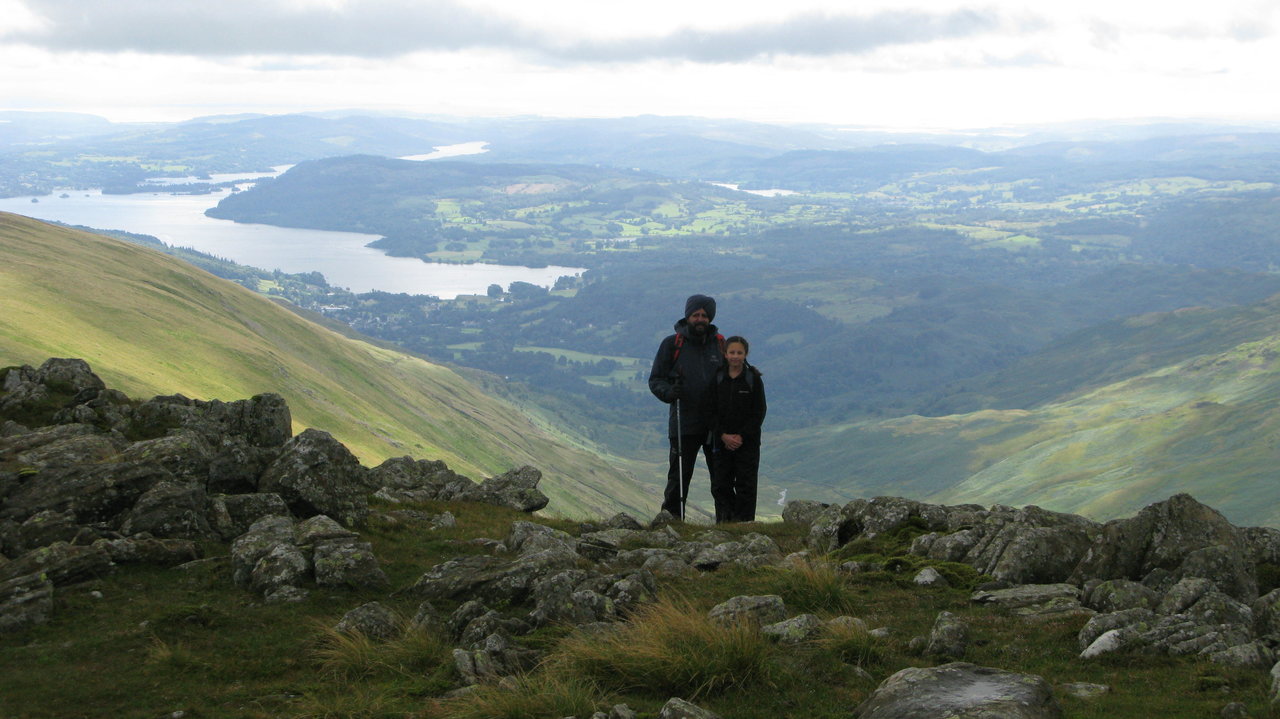
Pal and Mila, what a backdrop!
Admiring the route we walked up earlier this morning.

Mila and the summit cairn.

Dove Crag ahead with Red Screes beyond. If you look really closely you can see walkers down on the left, they’re on the path to Dovedale and the clear path alongside the wall leading into the distance is the horseshoe ridge path to High and Low Pike.

Looking down Deepdale Valley and across the Patterdale region to Place Fell.


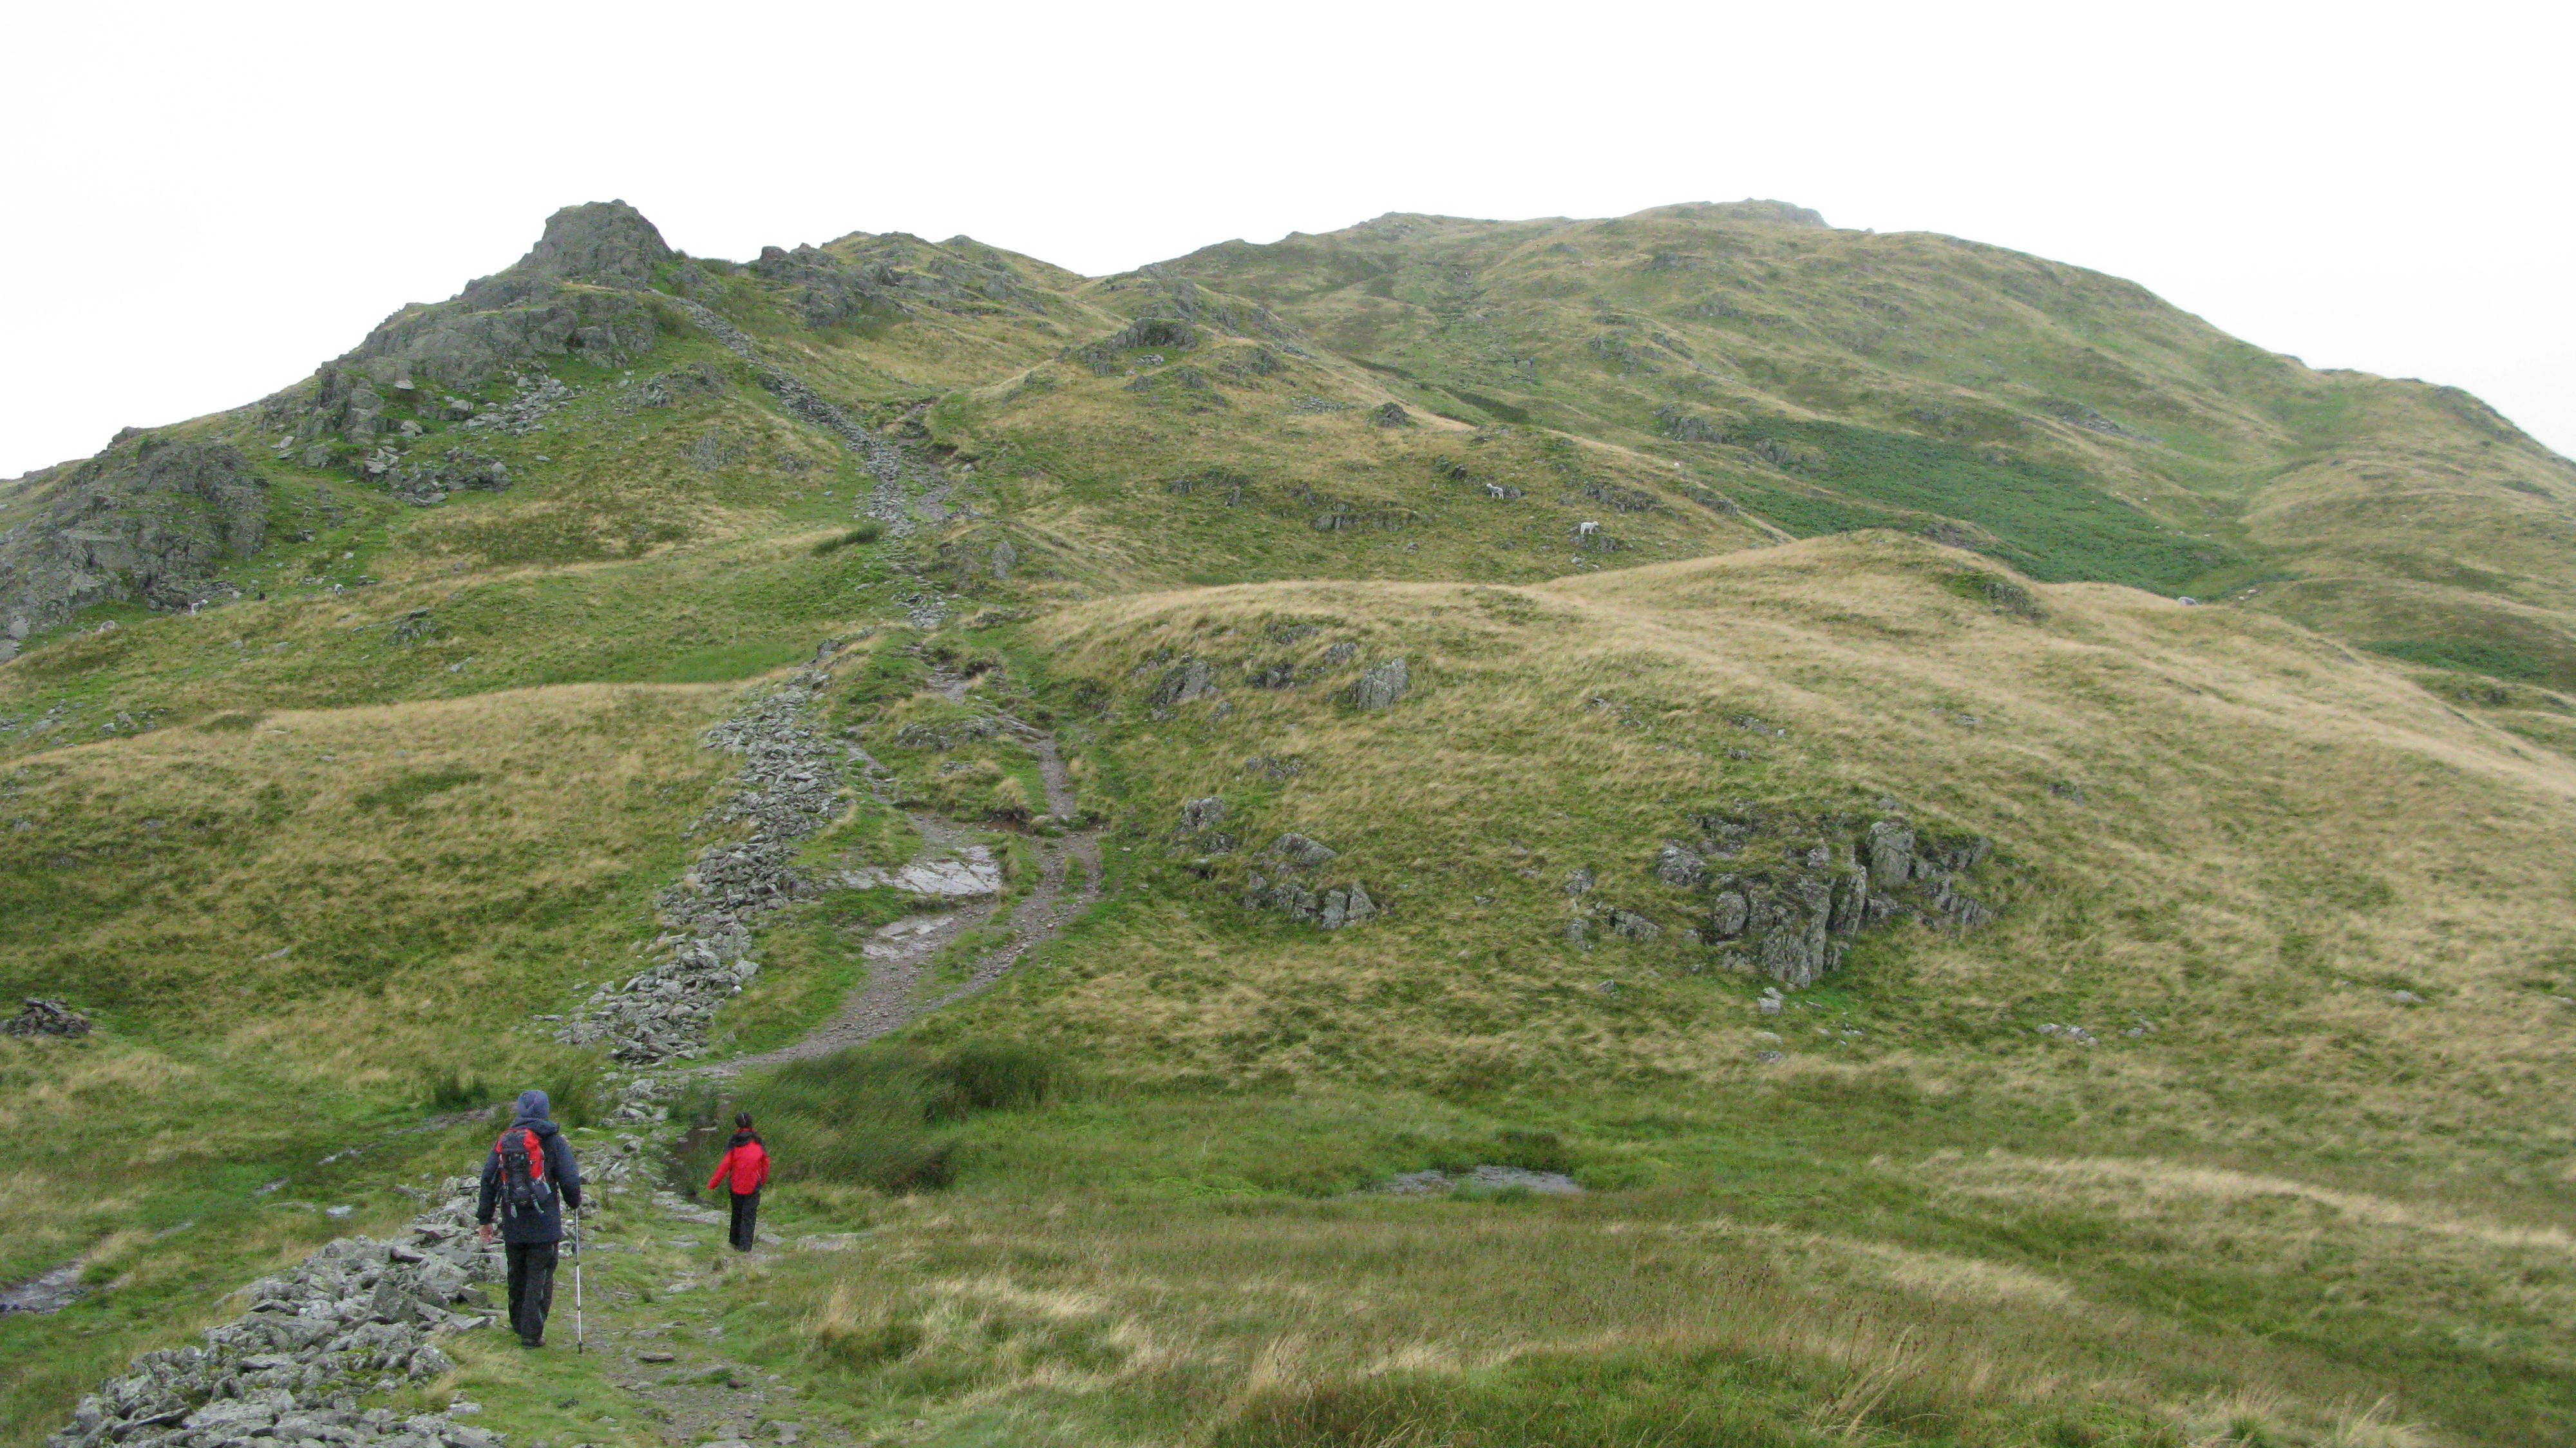
Walkers ahead are heading along the same route we’ll be following. We did’t see any walkers when we were ascending so I’m not sure where they came up from.

A rocky route down, the route is pretty obvious despite having no clear path at this point.

(AW Dove Crag 6) The summit of Dove Crag. “The actual top of the fell is a small rock platform crowned by a cairn, twenty yards east of the crumbling wall crossing the broad summit plateau . . . “

Another view from Dove Crag summit cairn.

From Dove Crag looking east to south. Left to right the fells are: Yoke; Red Screes and Wansfell Pike. Lake Windermere is on the right and below it in the photo you can just see the ridge path to High Pike.

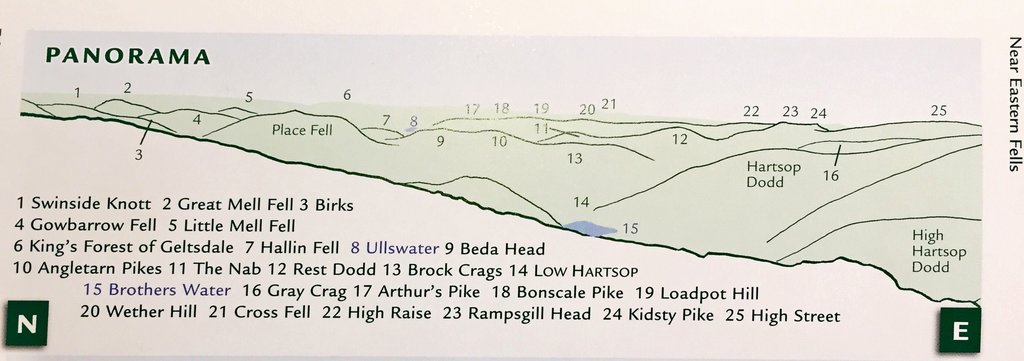
A wide panorama east to south of the view from Dove Crag with the fells named from Mark Richards Lakeland Fellranger Series ‘The Near Eastern Fells’ page76.


The view north to east from Dove Crag.
Here’s another diagram from the same page labelling the photograph above.
It’s an easy route for us to follow with the crumbling wall on our right. The ridge wall continues between Dove Crag and Low Sweden Bridge.

Looking back up to Dove Crag from High Pike?
Mila taking the opportunity to have a breather while she waits for Pal and I to catch up.
Mila waiting yet again . . . we must be going slow!
A very jolly Mila marching down the hill. There’s Low Pike ahead, i think! Navigation is easy . . . just follow the wall.
It’s an incredibly impressive wall when you think that all of this stone was found and cut to shape on the fell.
A chance to enjoy the view with all the walkers well ahead now.


Impressive wall isn’t it . . . ?


The stile is mid-way between Dove Crag and High Pike.

What’s new . . . ? Having no signal at the cottage gives everyone a breather from ‘being connected!’

I can’t quite remember whether this is the correct place but just before you get to Low Brock Crags at the lower end of Low Pike there is a sign; ‘Warning Deep Bog’ – but it’s been such a dry summer that it wasn’t a problem today.
 Sill on High Pike, I think. Since the wall is so high and well made there are very few places where it can be scaled the summit of Low Pike, further along the descent being one of them, though as AW says, it’s not recommended.


Looking back to High Pike.
 Low Pike – as AW (Low Pike 3) says, the ‘summit is an abrupt rocky peak, a place of grey boulders and small grassy platforms in the shadow of a substantial stone wall that occupies the highest inches.’


There’s Ambleside where we’re heading before returning to our car at Rydal Mount.


The above two photographs stitched together to form a panoramic view. Lake Windermere and Ambleside on the left of the photo


Having followed the wall there’s this very tricky descent at this point. We should have followed the wall south and then right just before reaching Low Sweden Bridge for Rydal but instead we continued straight into Ambleside – not too much of a problem and it gave us the opportunity to have some much needed refreshments in Ambleside!
AW says that this rock step is especially difficult when descending and after a couple of hesitant attempt we sensibly avoided this route and found an incredibly easy route just to the left of it – though it wasn’t obvious at first. 

Low Brock Crag and the rock-step (bad-step)


I think this is around Low Sweden Coppice. We continued through the bracken and through . . .
. . . the field leading to the path to Ambleside via Low Sweden Bridge then on to Nook Lane, not much further now . . .

Scandale Beck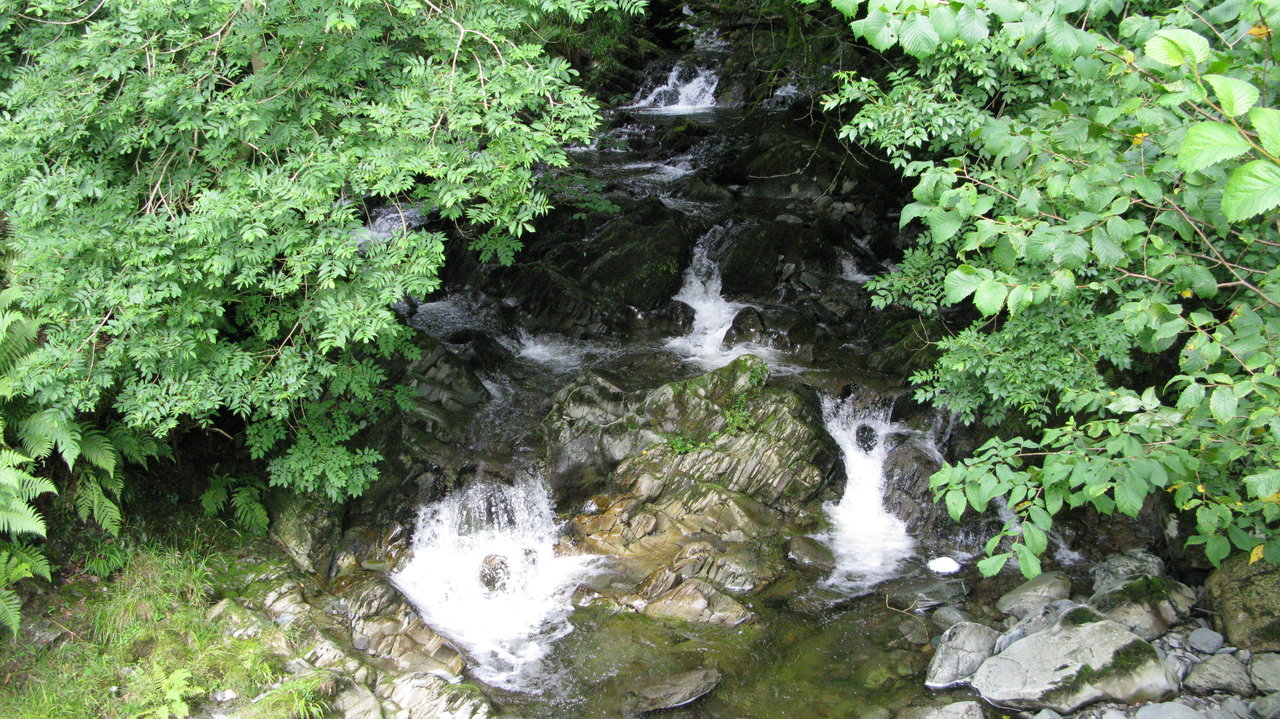
It’s always a relief to know we’re heading in the the right direction!
Almost down into Ambleside now. A great feeling of satisfaction having completed ‘The Fairfield Horseshoe’ with eight Wainwrights bagged! From the south, the direction we walked, it’s a great horseshoe of grassy slopes below a high skyline. Next time I’d like to approach the Fairfield range from the north, Patterdale, side which Wainwright (Fairfield 2) describes as being ‘dramatic’ and ‘magnificent’ with ‘dark precipices, long fans of scree, abrupt crags, desolate combes and deep valleys.’
We walked passed the University of Cumbria buildings, on into Ambleside. The first cafe we came across was ‘The Gaggling Geese’ perfect, a table out in the garden overlooking Stock Ghyll and a well earned drink! The cafe closed shortly afterwards so we had timed it perfectly. A fantastic walk.
Wainwright says that from the direction we walked (south) you only get only the ‘merest glimpse of its best features!’ – Which means that next time we’ll have to approach from the north . . .
From Ambleside we walked along the path beside Rydal Road (A591) back to Rydal where we had parked the car this morning. A perfect day.